Securing Next.js Apps with Keycloak

In this article we'll be using Keycloak to to quickly secure a Next.js application with user management and single sign on (SSO) using the open source IAMs Keycloak for Authentication and Authorization. We will demonstrate the integration by securing a page for logged-in users. This quickly provides a jump-off point to more complex integrations.
If you just want to skip to the code, visit the Phase Two Next.js example. We also have a plain React example.
Setting up a Keycloak Instance
Instructions
If you already have a functioning Keycloak instance, you can skip to the next section.
Rather than trying to set up a "from scratch" instance of Keycloak, we're going to short-circuit that process by leveraging a free Phase Two Starter instance. The Starter provides a free hosted instance of Phase Two's enhanced Keycloak ready for light production use cases.
-
Visit the sign-up page.
-
Enter an email, use a Github account, or use an existing Google account to register.
-
Follow the register steps. This will include a sign-in link being sent to your email. Use that for password-less login.

-
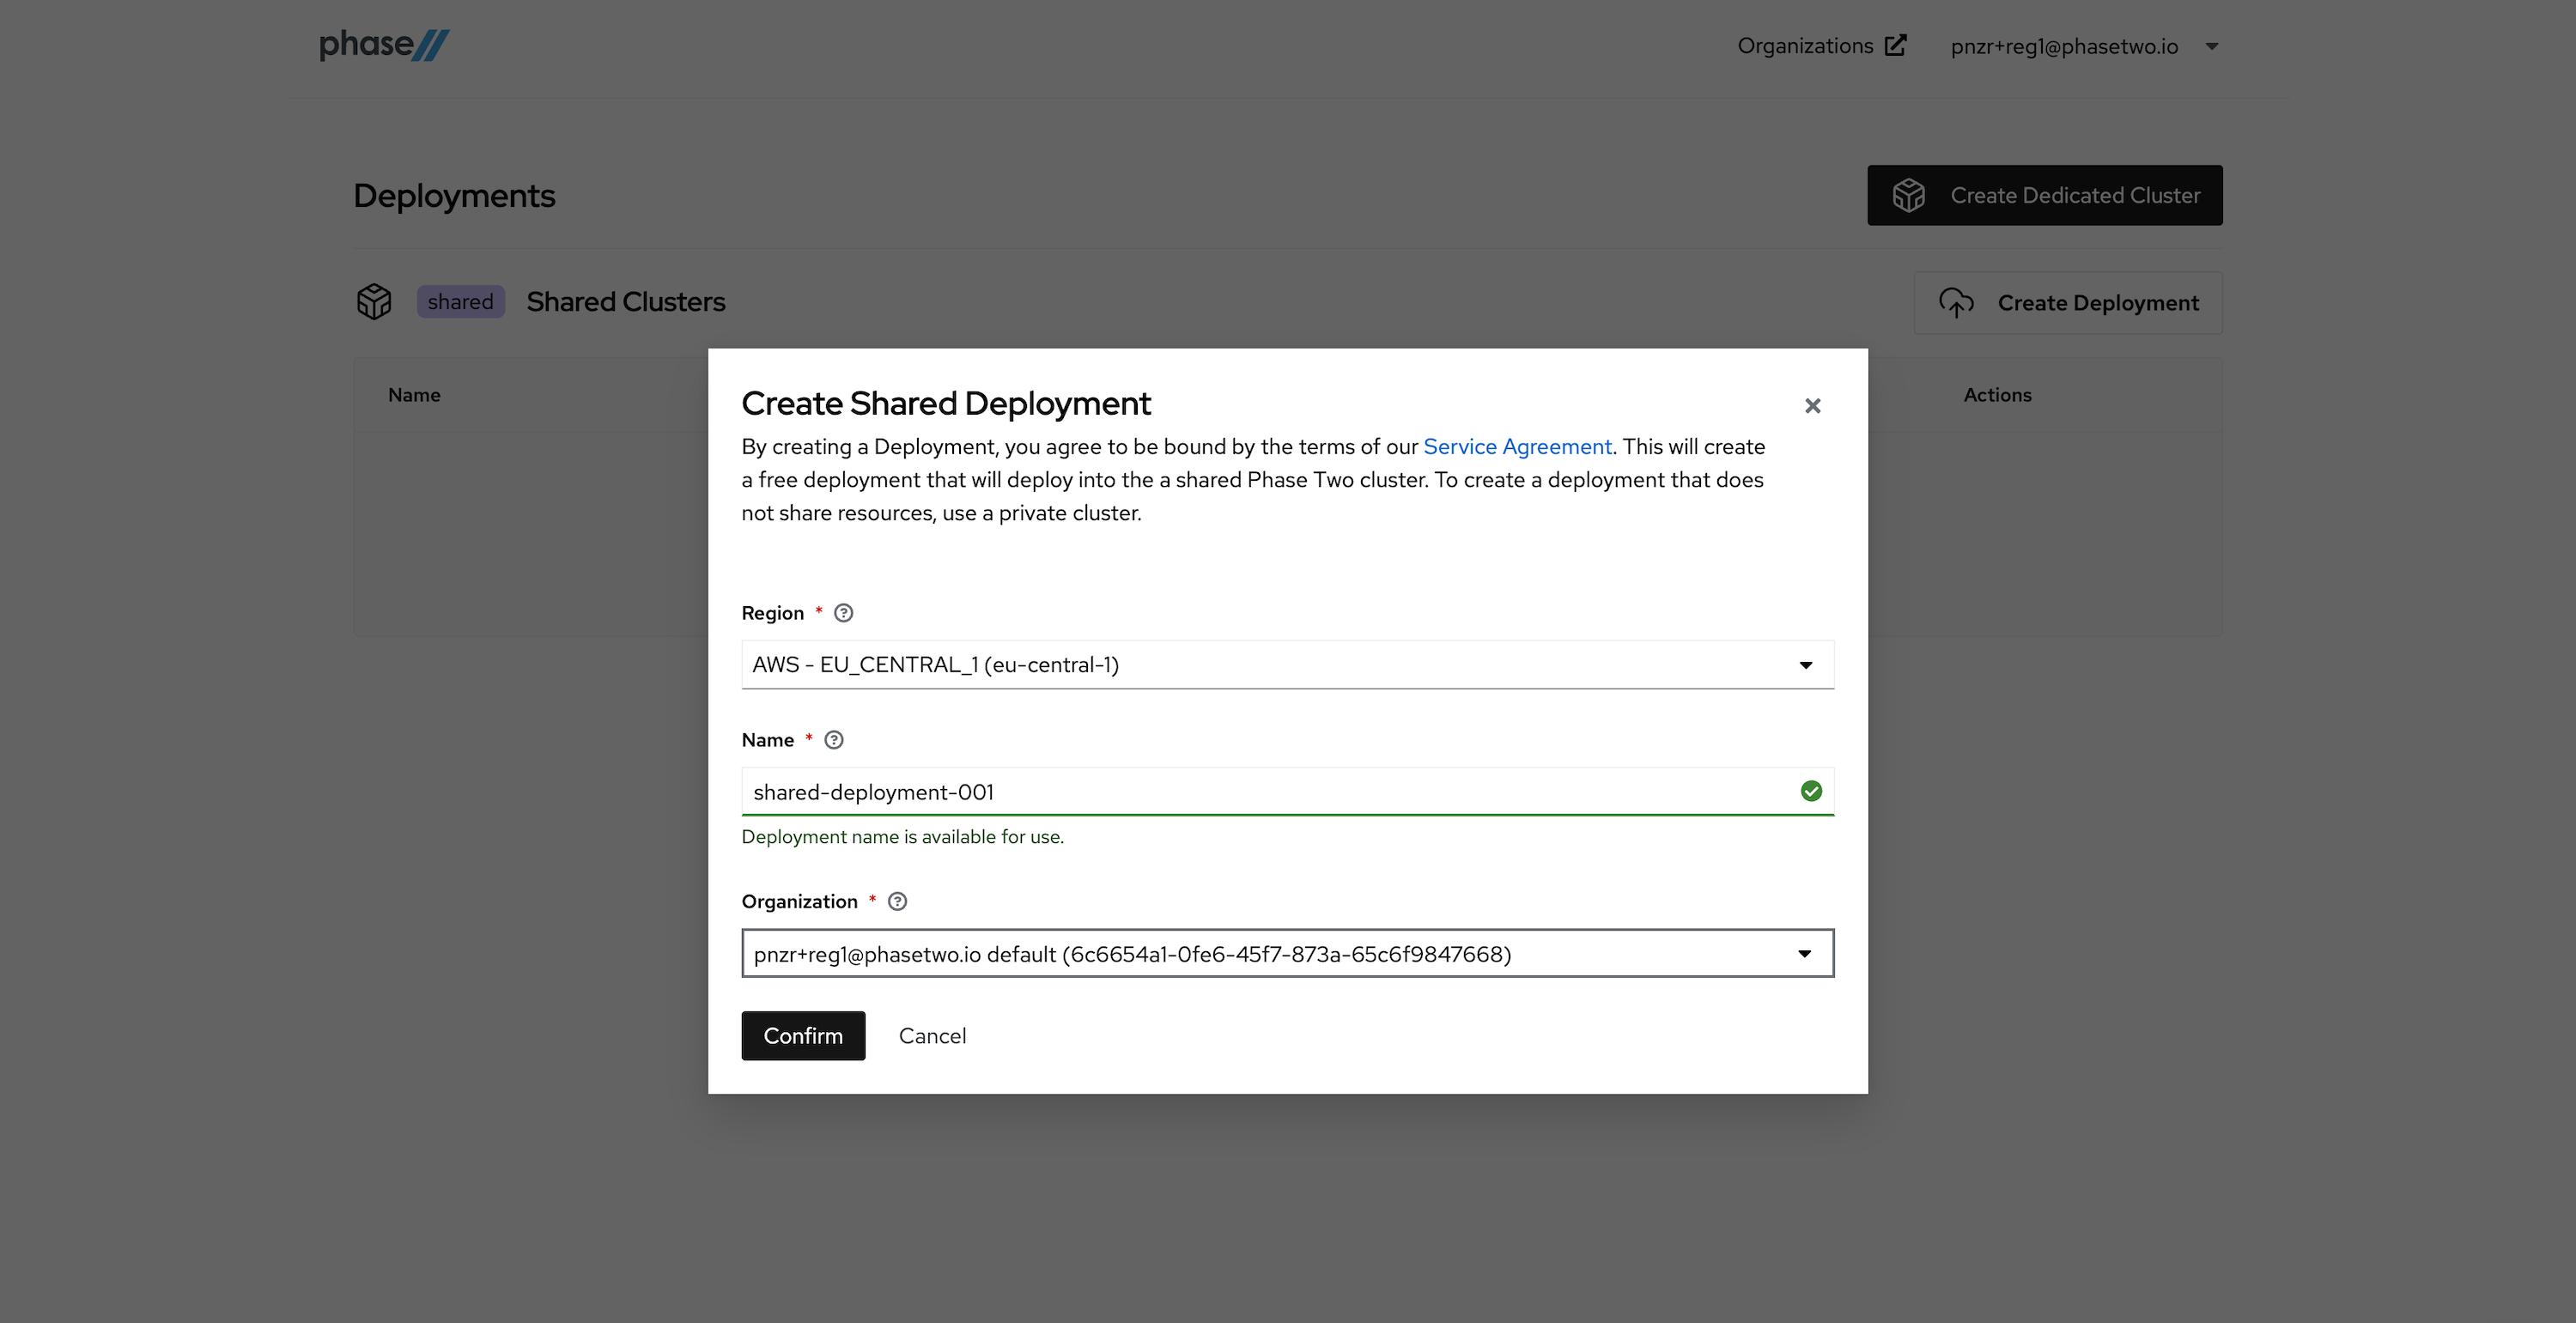
After creating an account, a realm is automatically created for you with all of the Phase Two enhancements. You need to create a Deployment in the Shared Phase Two infrastructure in order to gain access to the realm. Without a deployment created, the Create Shared Deployment modal will automatically pop up.
-
Create a Shared Deployment by providing a region (pick something close to your existing infrastructure), a name for the deployment, and selecting the default organization that was created for you upon account creation. Hit "Confirm" when ready. Standby while our robots get to work generating your deployment. This can take a few seconds.
-
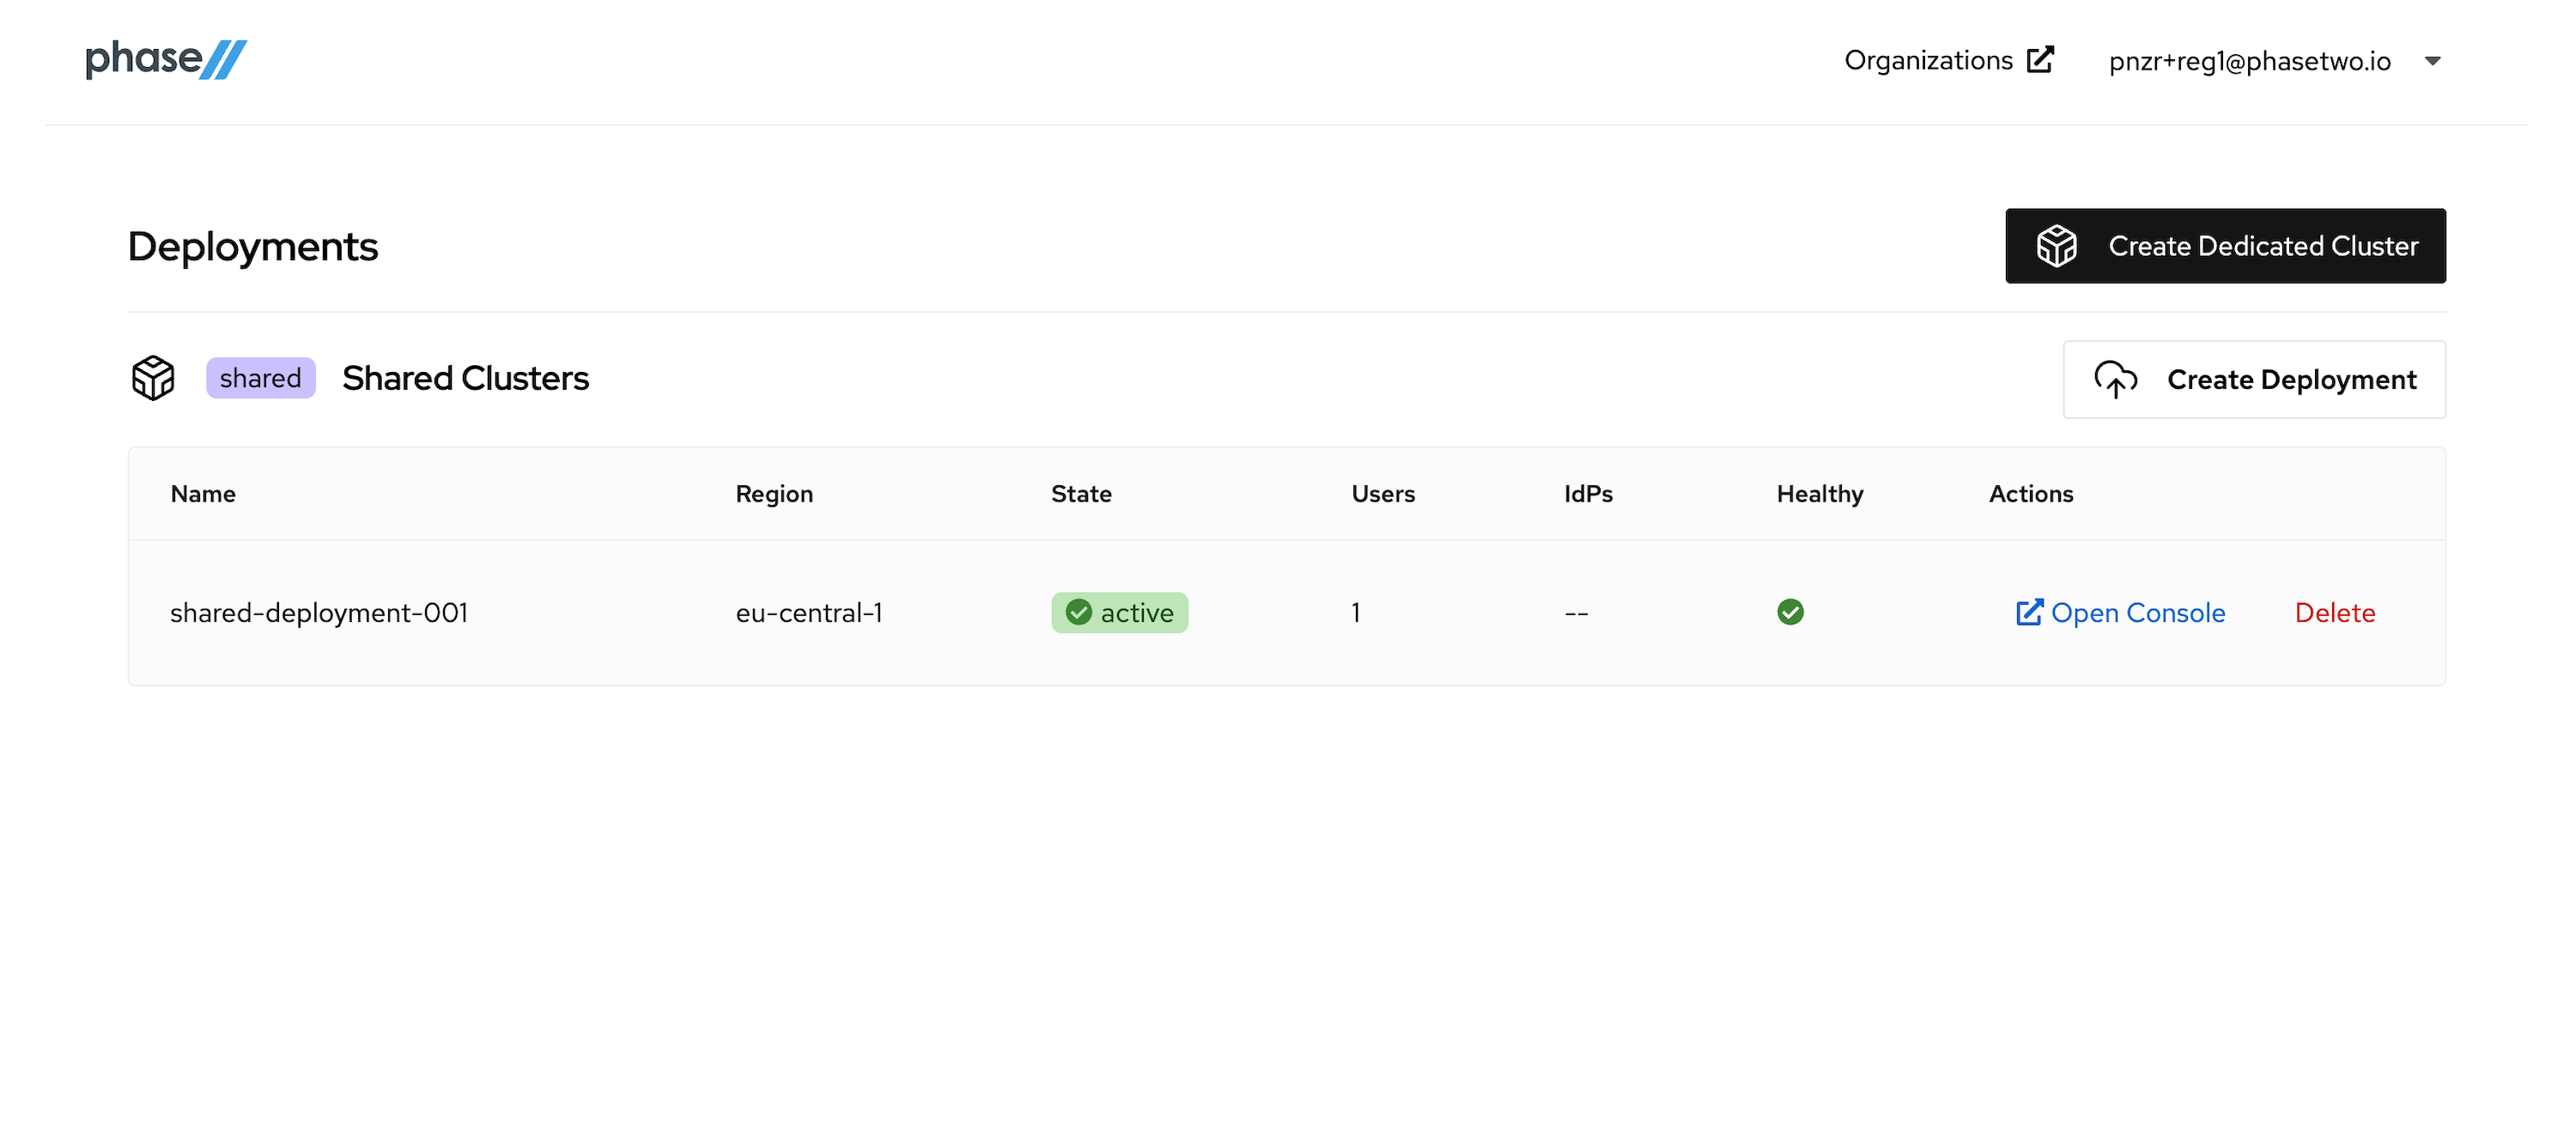
After the deployment is created and active, you can access the Keycloak Admin console by clicking "Open Console" for that deployment. Open it now to see the console.
At this point, move on to the next step in the tutorial. We'll be coming back to the Admin Console when its time to start connecting our App to the Keycloak instance.
Setting up an OIDC Client
Instructions
We need to create a OpenID Connect Client in Keycloak for the app to communicate with. Keycloak's docs provide steps for how to create an OIDC client and all the various configurations that can be introduced. Follow the steps below to create a client and get the right information necessary for app configuration.
-
Open the Admin UI by clicking Open Console in the Phase Two Dashboard.
-
Click Clients in the menu.
-
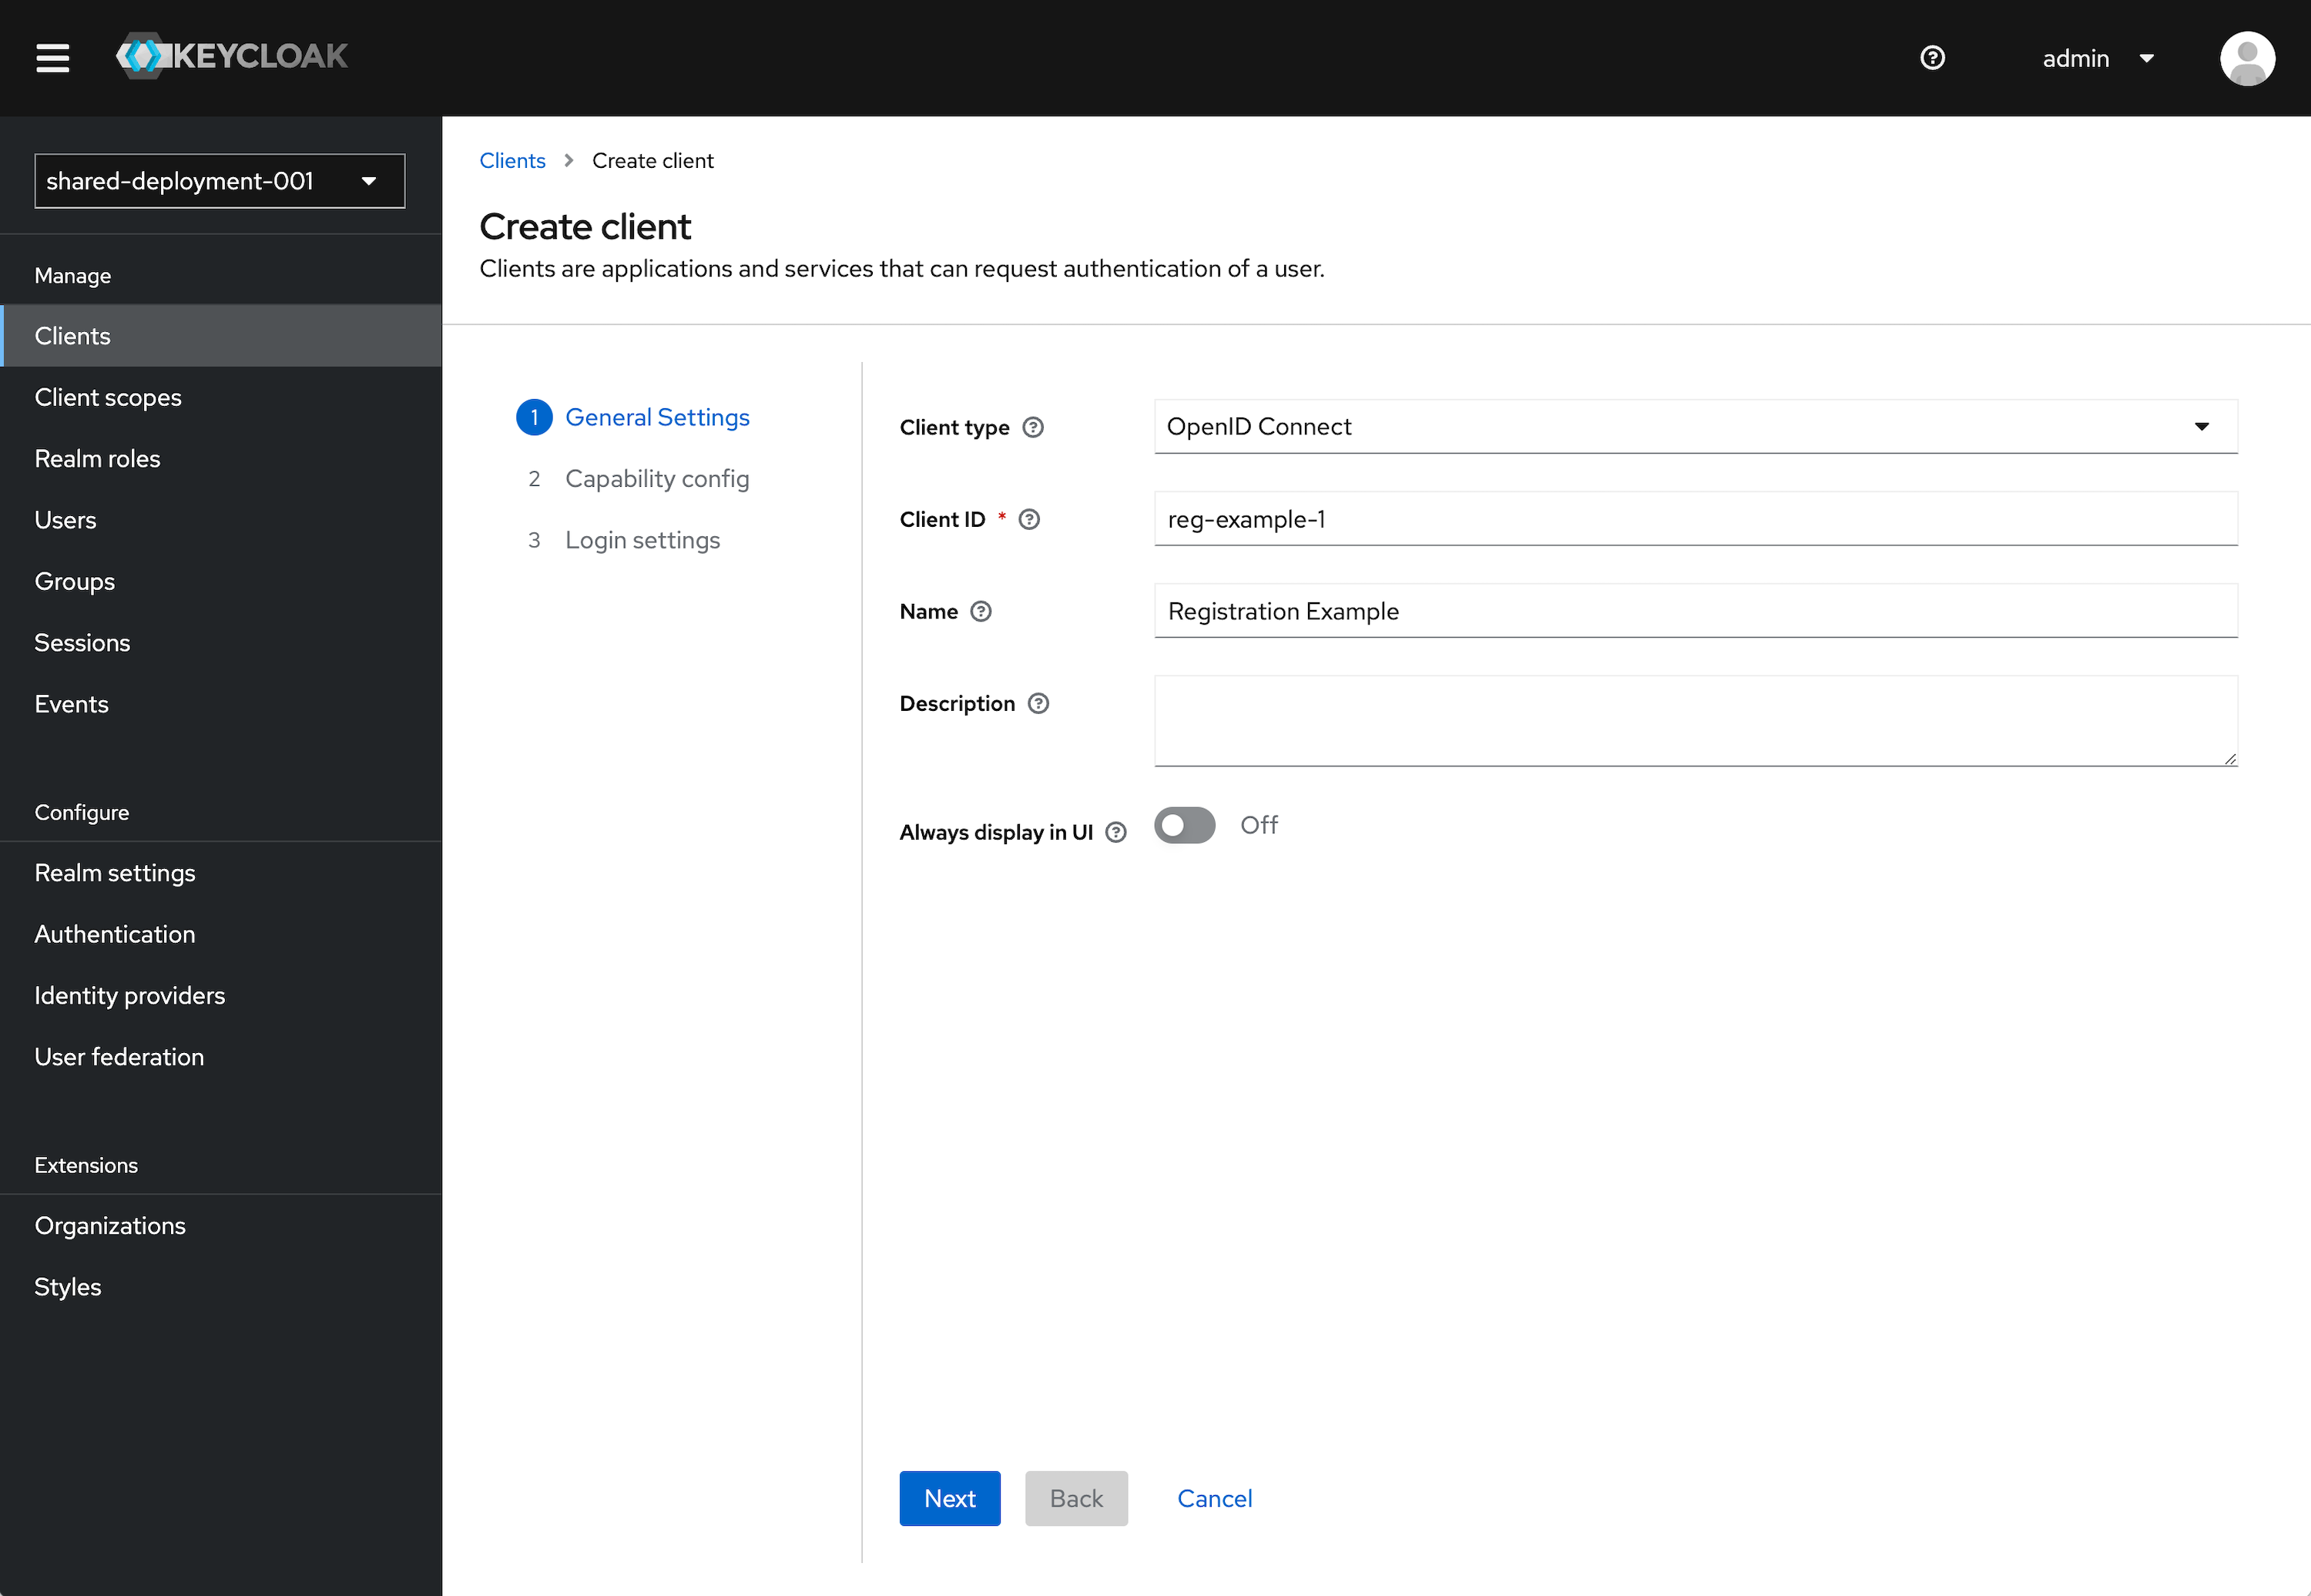
Click Create client.
-
Leave Client type set to OpenID Connect.
-
Enter a Client ID. This ID is an alphanumeric string that is used in OIDC requests and in the Keycloak database to identify the client.
-
Supply a Name for the client.
-
Click Next.
-
Under the Capability Config section, leave the defaults as selected. This can be configured further later.
- Client authentication to On.
- Authorization to Off.
- Standard flow checked. Direct access grants checked. All other items unchecked.
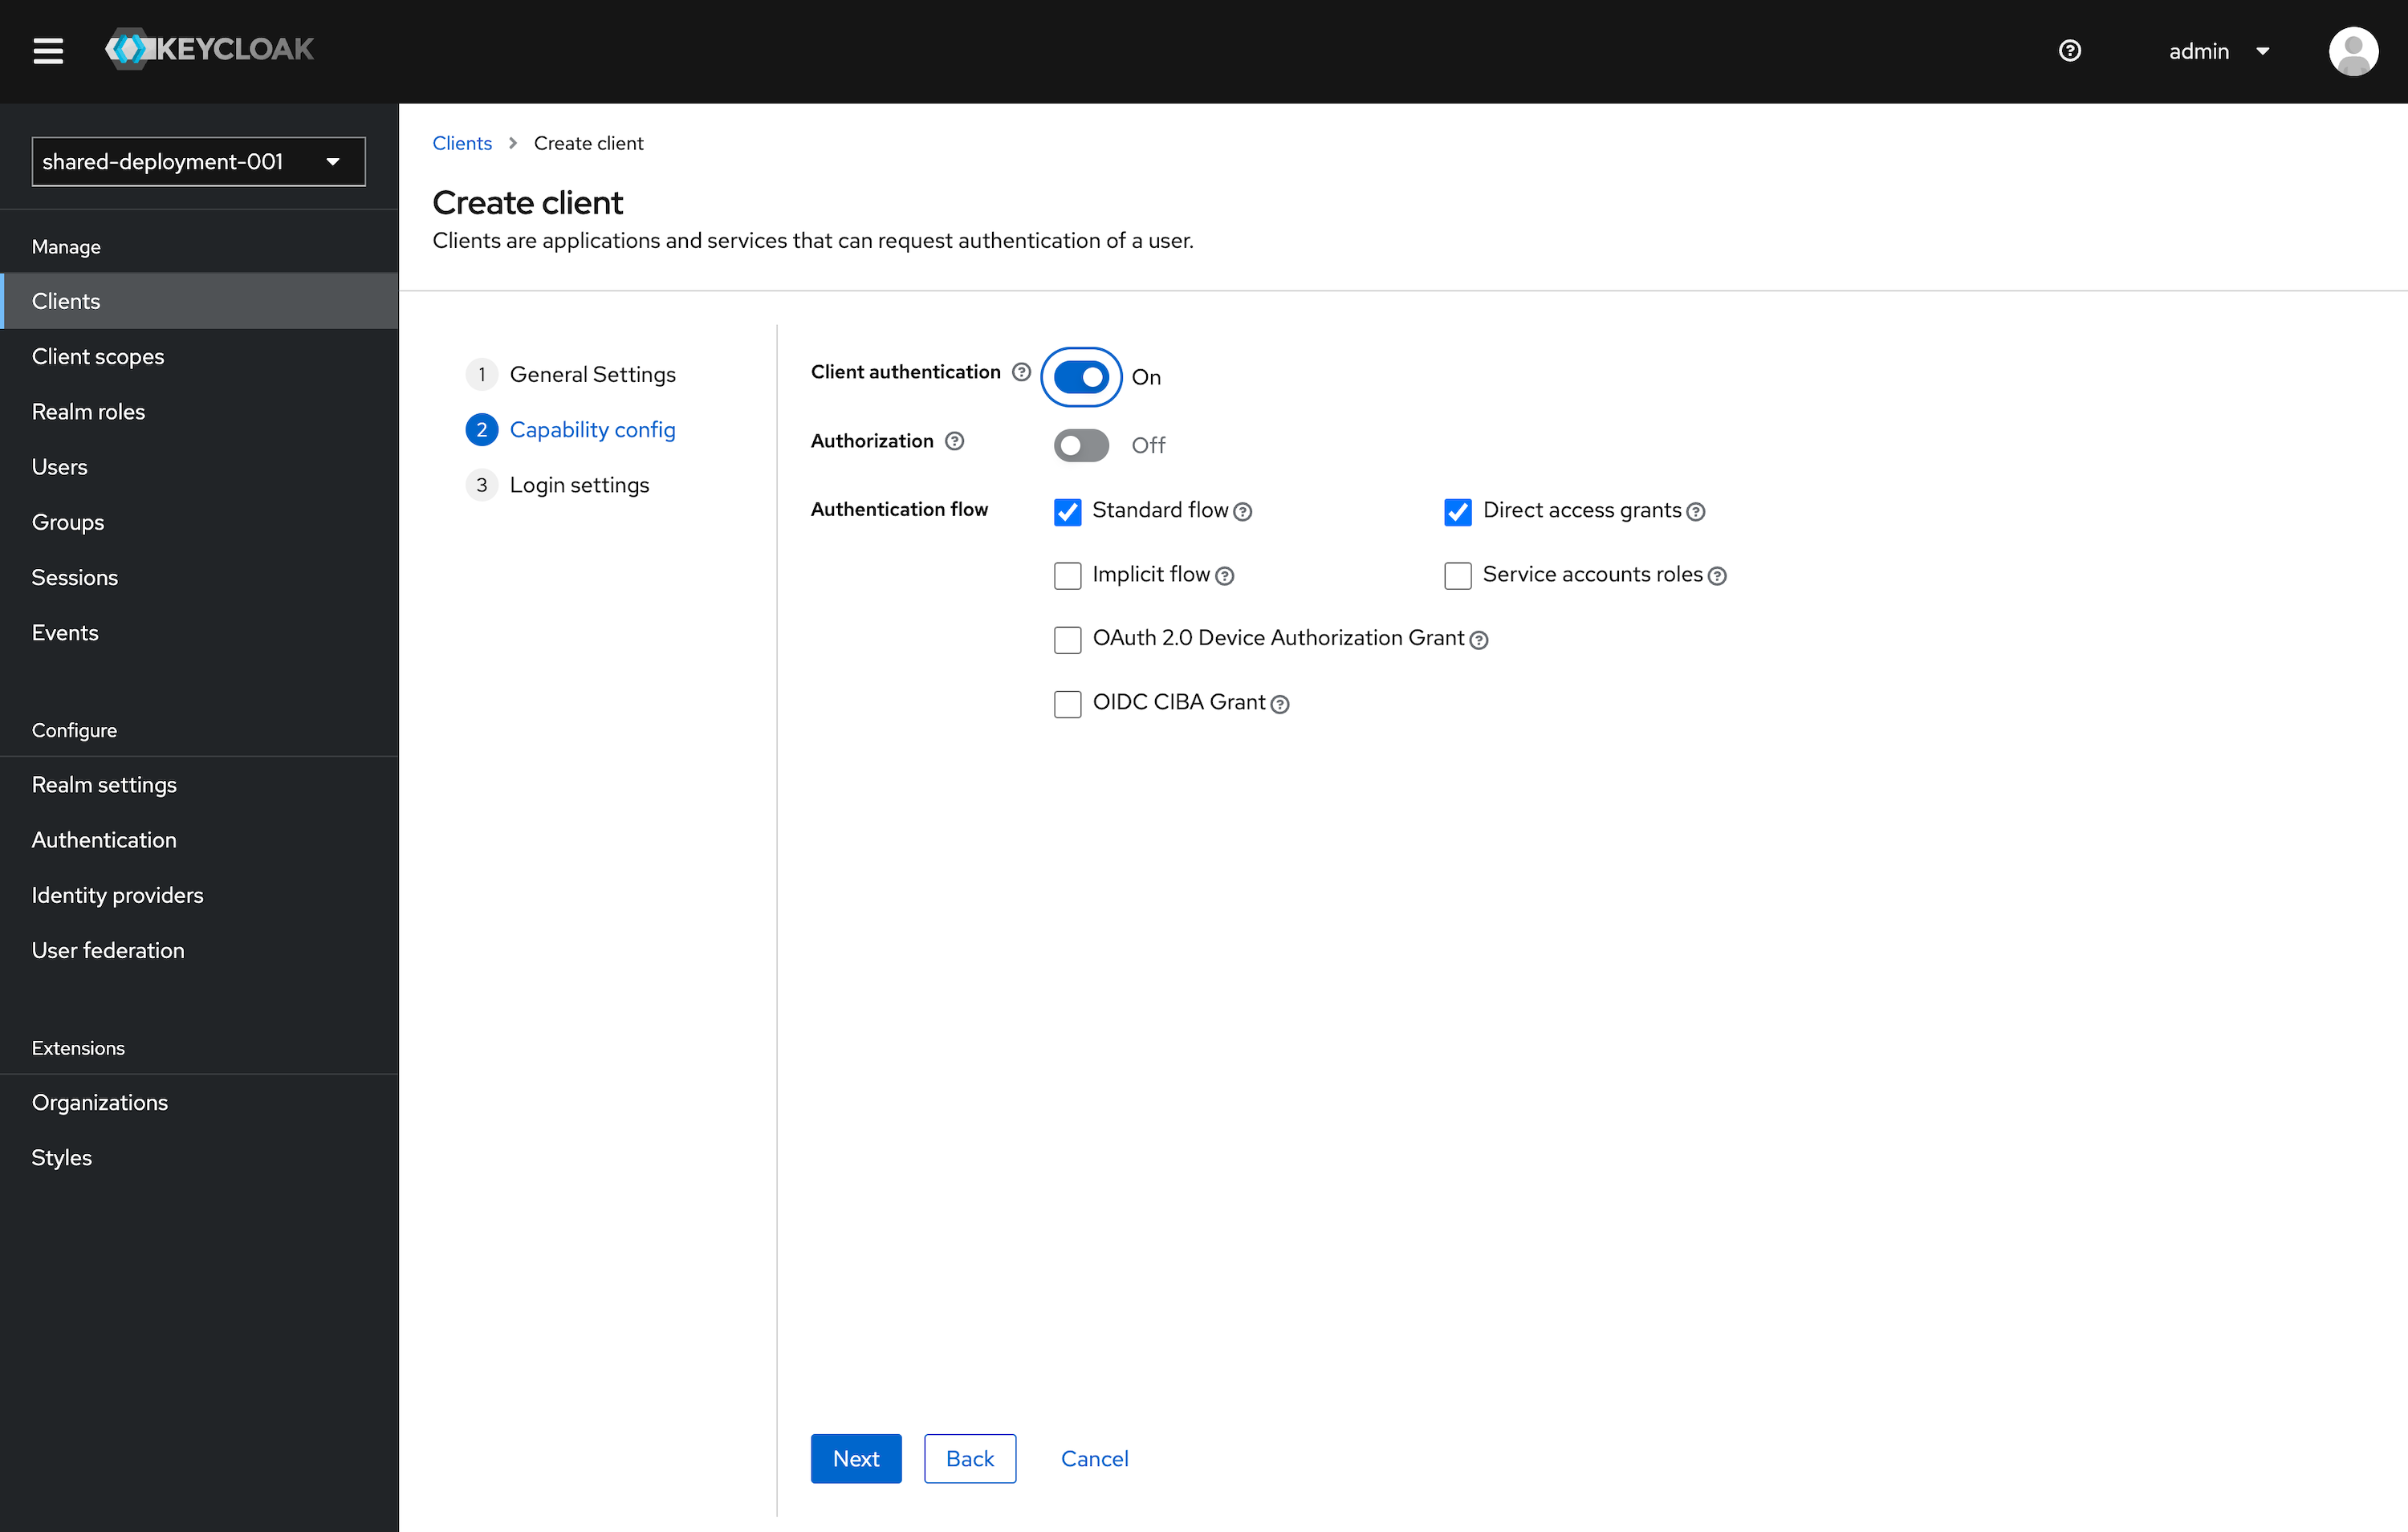
Click Next.
-
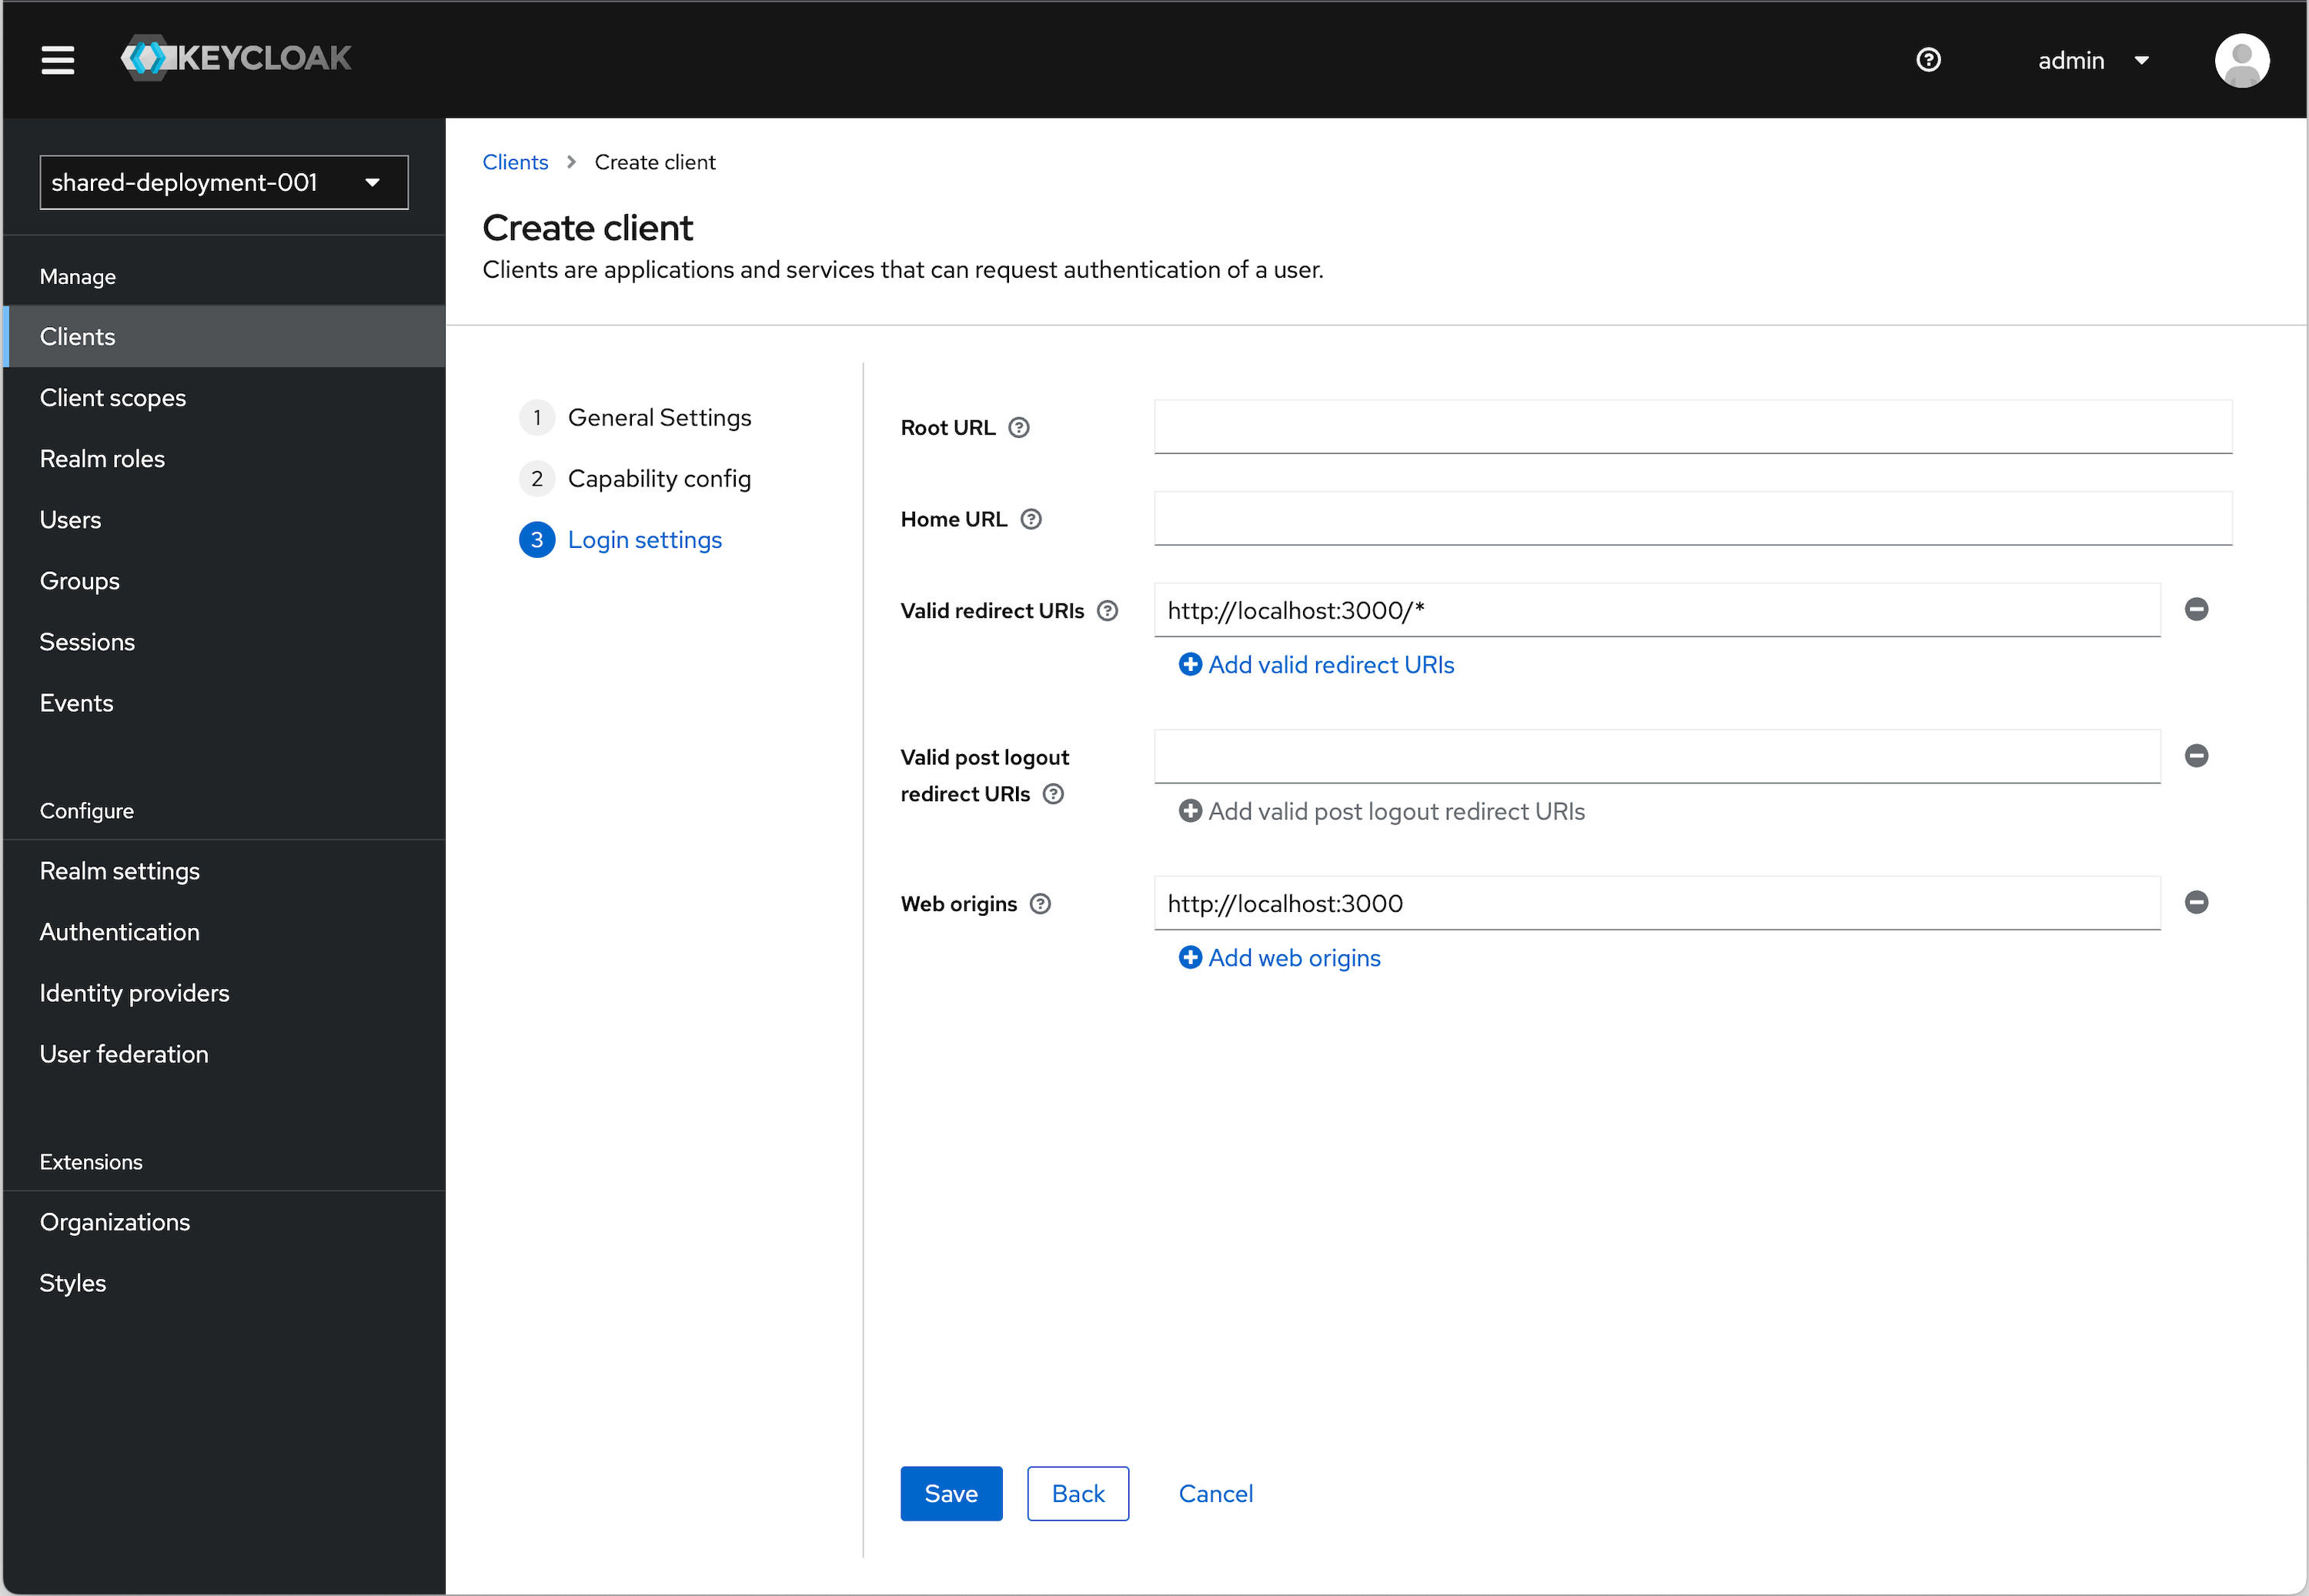
Under Login settings we need to add a redirect URI and Web origin in order. Assuming you are using the example applicaiton:
Valid redirect URI (allows redirect back to application)
http://localhost:3000/*Web origins (allows for Token auth call)
http://localhost:3000URI and Origin Details
The choice of
localhostis arbitrary. If you are using an example application running locally, this will apply. If you are using an app that you actually have deployed somewhere, then you will need to substitute the appropriate URI for that. -
Click Save
OIDC Config
We will need values to configure our application. To get these values follow the instructions below.
-
Click Clients in the menu.
-
Find the Client you just created and click on it. In the top right click the Action dropdown and select Download adapter config.
-
Select Keycloak OIDC JSON in the format option. The details section will populate with the details we will need.
- Note the
realm,auth-server-url, andresourcevalues.

- Note the
-
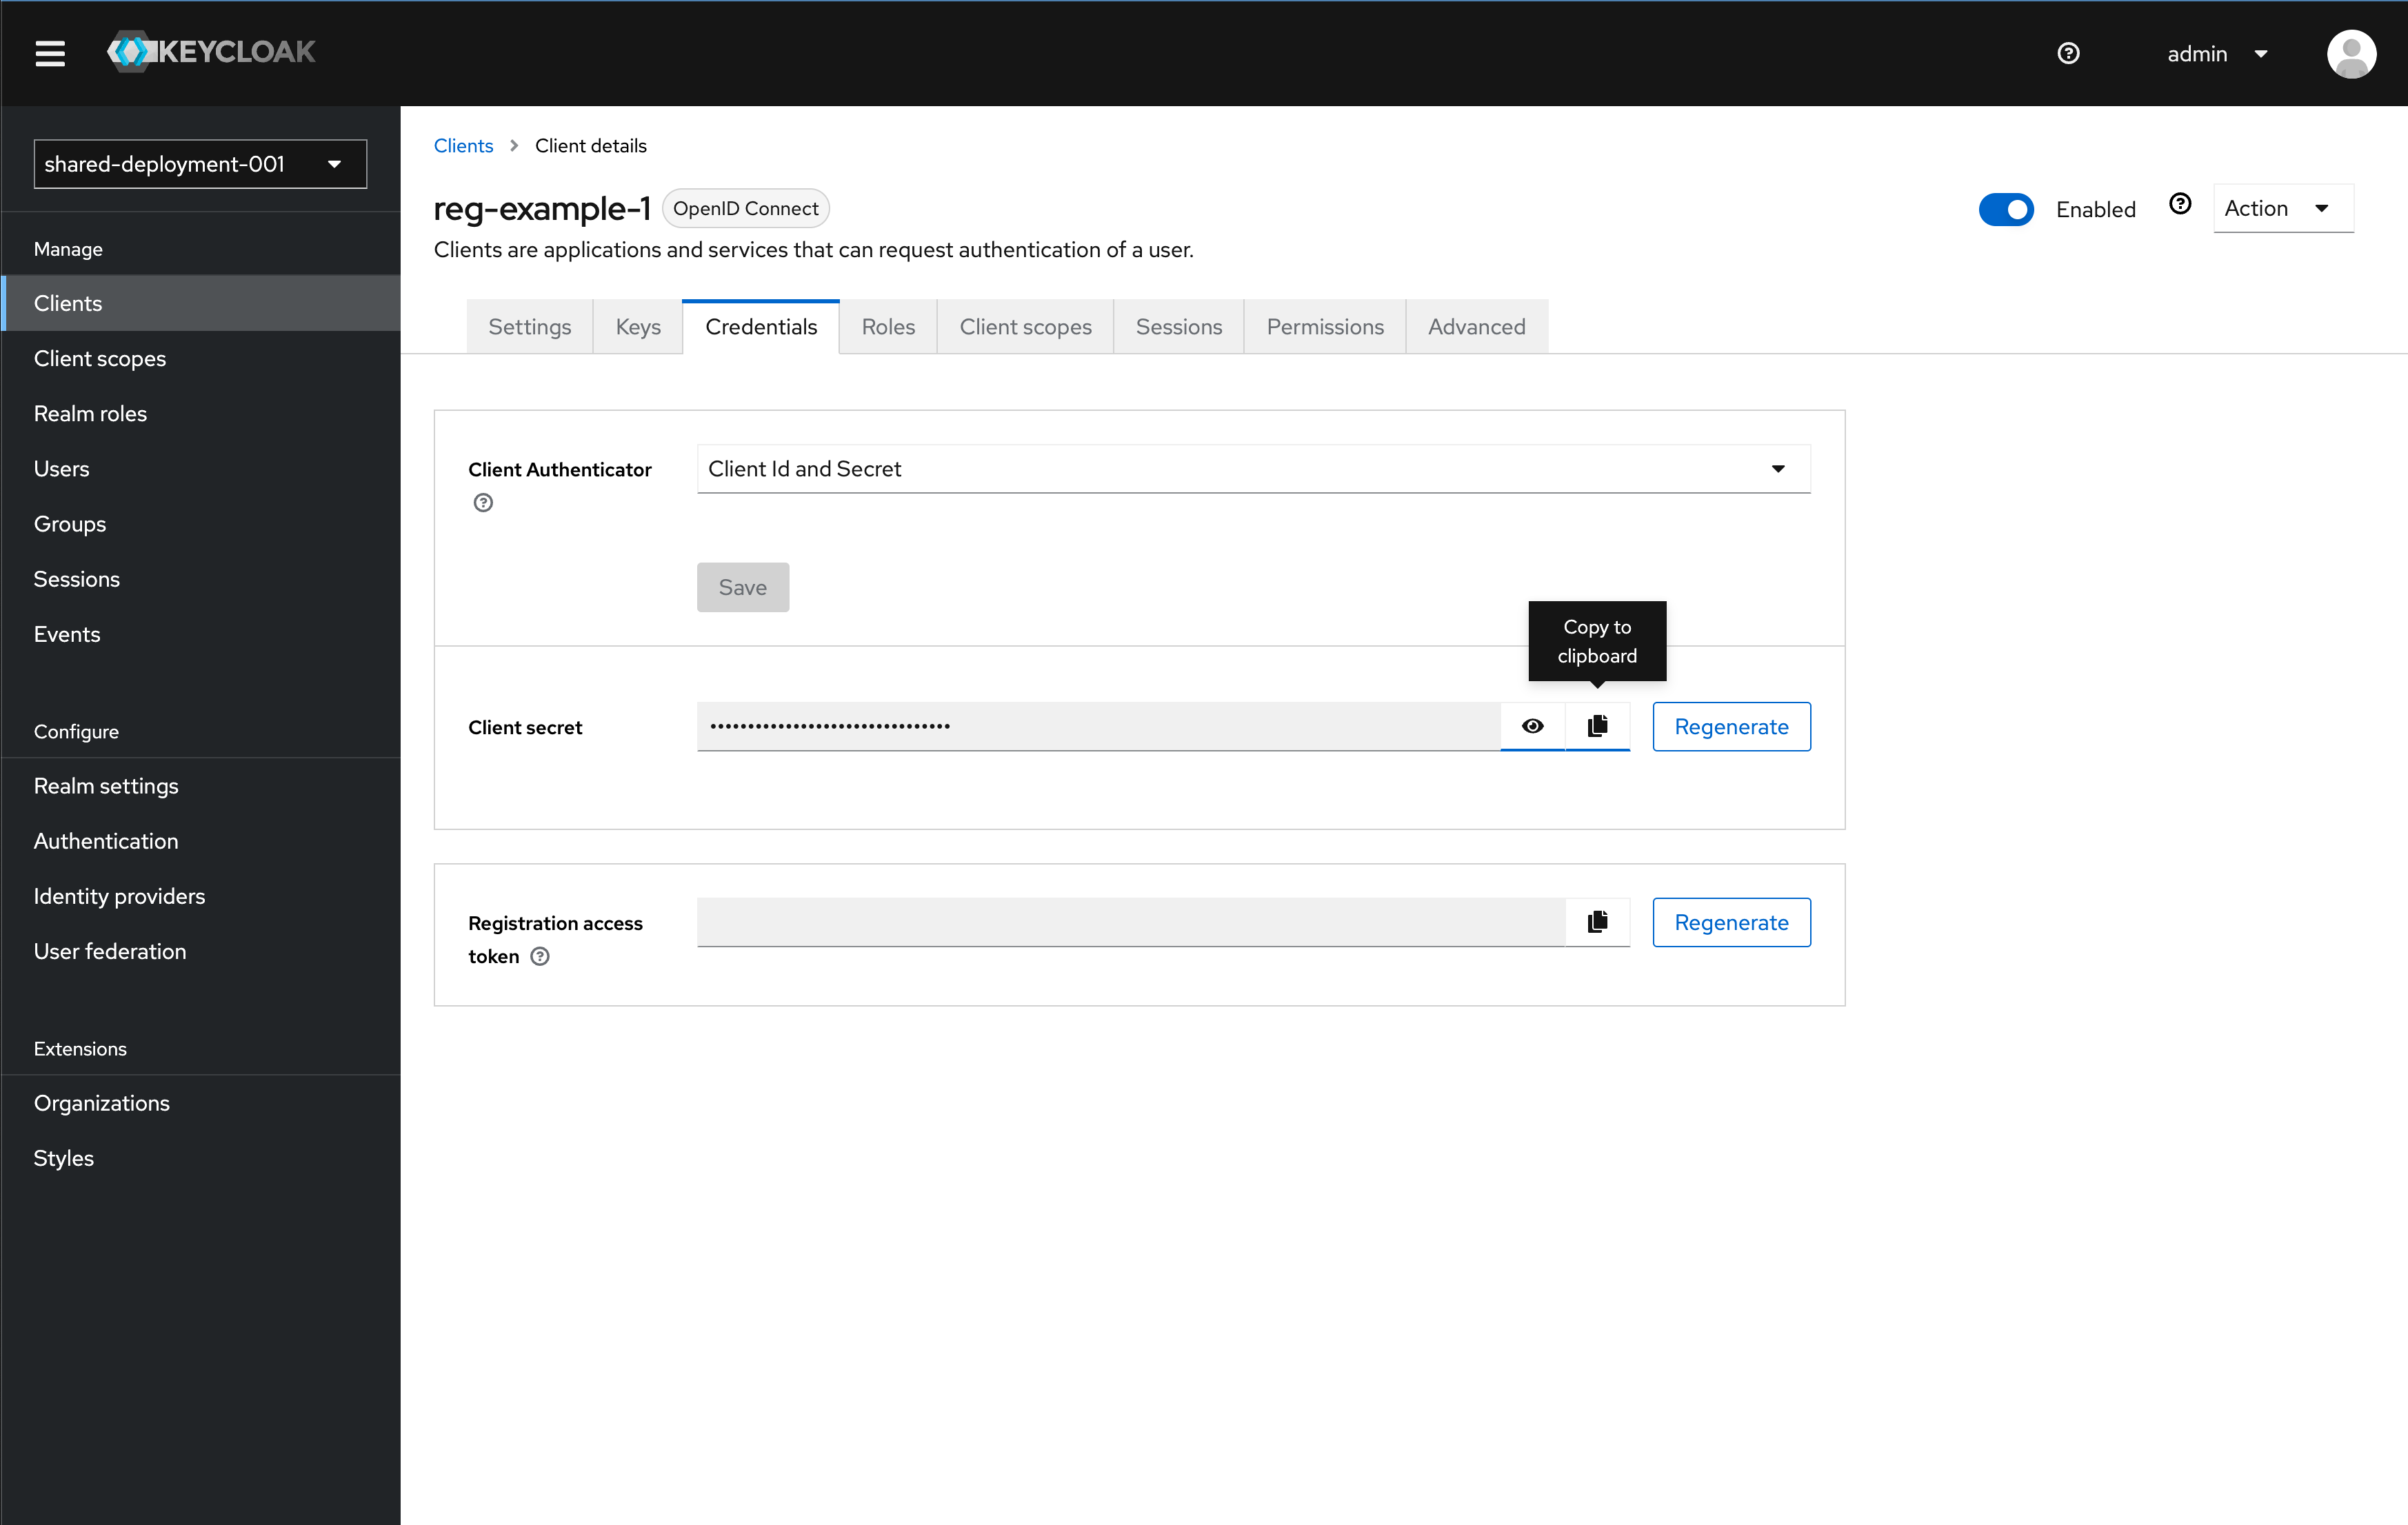
You also need to copy the Client secret in the Credential tab for the client to use. Once on the Credential tab, click the copy button to copy the key to your clipboard. Save the key somewhere for use later in this tutorial
Adding a Non-Admin User
Instructions
It is bad practice to use your Admin user to sign in to an Application.
Since we do not want to use our Admin user for signing into the app we will build, we need to add a another non-admin user.
- Open the Admin UI by clicking Open Console in the Phase Two Dashboard.
- Click Users in the menu.
- Click Add user.
- Fill out the information for Email, First name, and Last name. Click Create.
- We will now set the password for this user manually. Click Credentials (tab) and click Set Password. Provide a password for this user. For our use case, as a tutorial, you can leave "Temporary" set to "Off".
- Click Save and confirm the password by clicking Save password
Setting up a Next.js Project
We will use the Phase Two Next.js example code here, but the logic could easily be applied to any existing application.
This example uses Next.js 13 and splits server and client components accordingly.
-
Clone the Phase Two example repo.
-
Open the Next.js folder within
/frameworks/nextjs. -
Run
npm installand thennpm run dev. This example leverages NextAuth.js to provide hook and HOC support. -
NextAuth.js configures an API route that is uses for the Authentication of the Client. It generates the routes automatically for you. These are added to Next.js in the
api/auth/[...nextauth]/route.tsfile. -
Open the
src/lib/auth.tsfile. This is a server only file. We will be updating a few values from the prior section where we set up our OIDC client. Taking the values from the OIDC Client Config section, set those values in the code. While it is recommended to use Environment variables for the secret, for the purpose of this tutorial, paste in the Client secret from the OIDC client creation section for the value ofclientSecretconst authServerUrl = "https://euc1.auth.ac/auth/";const realm = "shared-deployment-001";const clientId = "reg-example-1";const clientSecret = "CLIENT_SECRET"; // Paste "Client secret" here. Use Environment variables in prodThose are used to popluate the
AuthOptionsconfig for theKeycloakProvider:export const AuthOptions: NextAuthOptions = {providers: [KeycloakProvider({clientId,clientSecret,issuer: `${authServerUrl}realms/${realm}`,}),],};The config is then provided to the
AuthProviderin the/src/app/layout.tsxfile. Next.js uses this file to generate an HTML view for this page.import { NextAuthProvider as AuthProvider } from "./providers";...<AuthProvider {...oidcConfig}><App /></AuthProvider>At this point our entire application will be able to access all information and methods needed to perform authentication. View the
providers.tsxfile for additional information about how theSessionProvideris used. TheSessionProviderenables use of Hooks to derive the authenticated state. Viewuser.component.tsxfor exactly how the code is authenticating your user. The sections rendering the "Log in" and "Log out" buttons are conditional areas based on the authenticated context. The buttons invoke functions provided by NextAuth.The logic using the hook to conditionally determine the Authenticated state, can be used to secure routes, components, and more.
-
Open localhost:3000. You will see the Phase Two example landing page. You current state should be "Not authenticated". Click Log In. This will redirect you to your login page.
infoUse the non-admin user created in the previous section to sign in.
-
Enter the credentials of the non-admin user you created. Click Submit. You will then be redirected to the application. The Phase Two example landing page now loads your "Authenticated" state, displaying your user's email and their Token.
-
After your first log in, click Log out. Then click Log in again. Notice how this time you will not be redirected to sign in as your state is already in the browser. Neat! If you clear the browser state for that tab, then you will have to be redirected away to sign-in again.
Learning more
Phase Two's enhanced Keycloak provides many ways to quickly control and tweak the log in and user management experience. Our blog has many use cases from customizing login pages, setting up magic links (passwordless sign in), and Organization workflows.