Teams (Organizations)
Teams, or Organizations, allow you to create a team to manage your Phase Two Deployments and Clusters. You can use the Teams link in the navigation to view and manage your organization for teams you are a member. Every realm and cluster also displays information about the associated team.
Visit the Teams overview
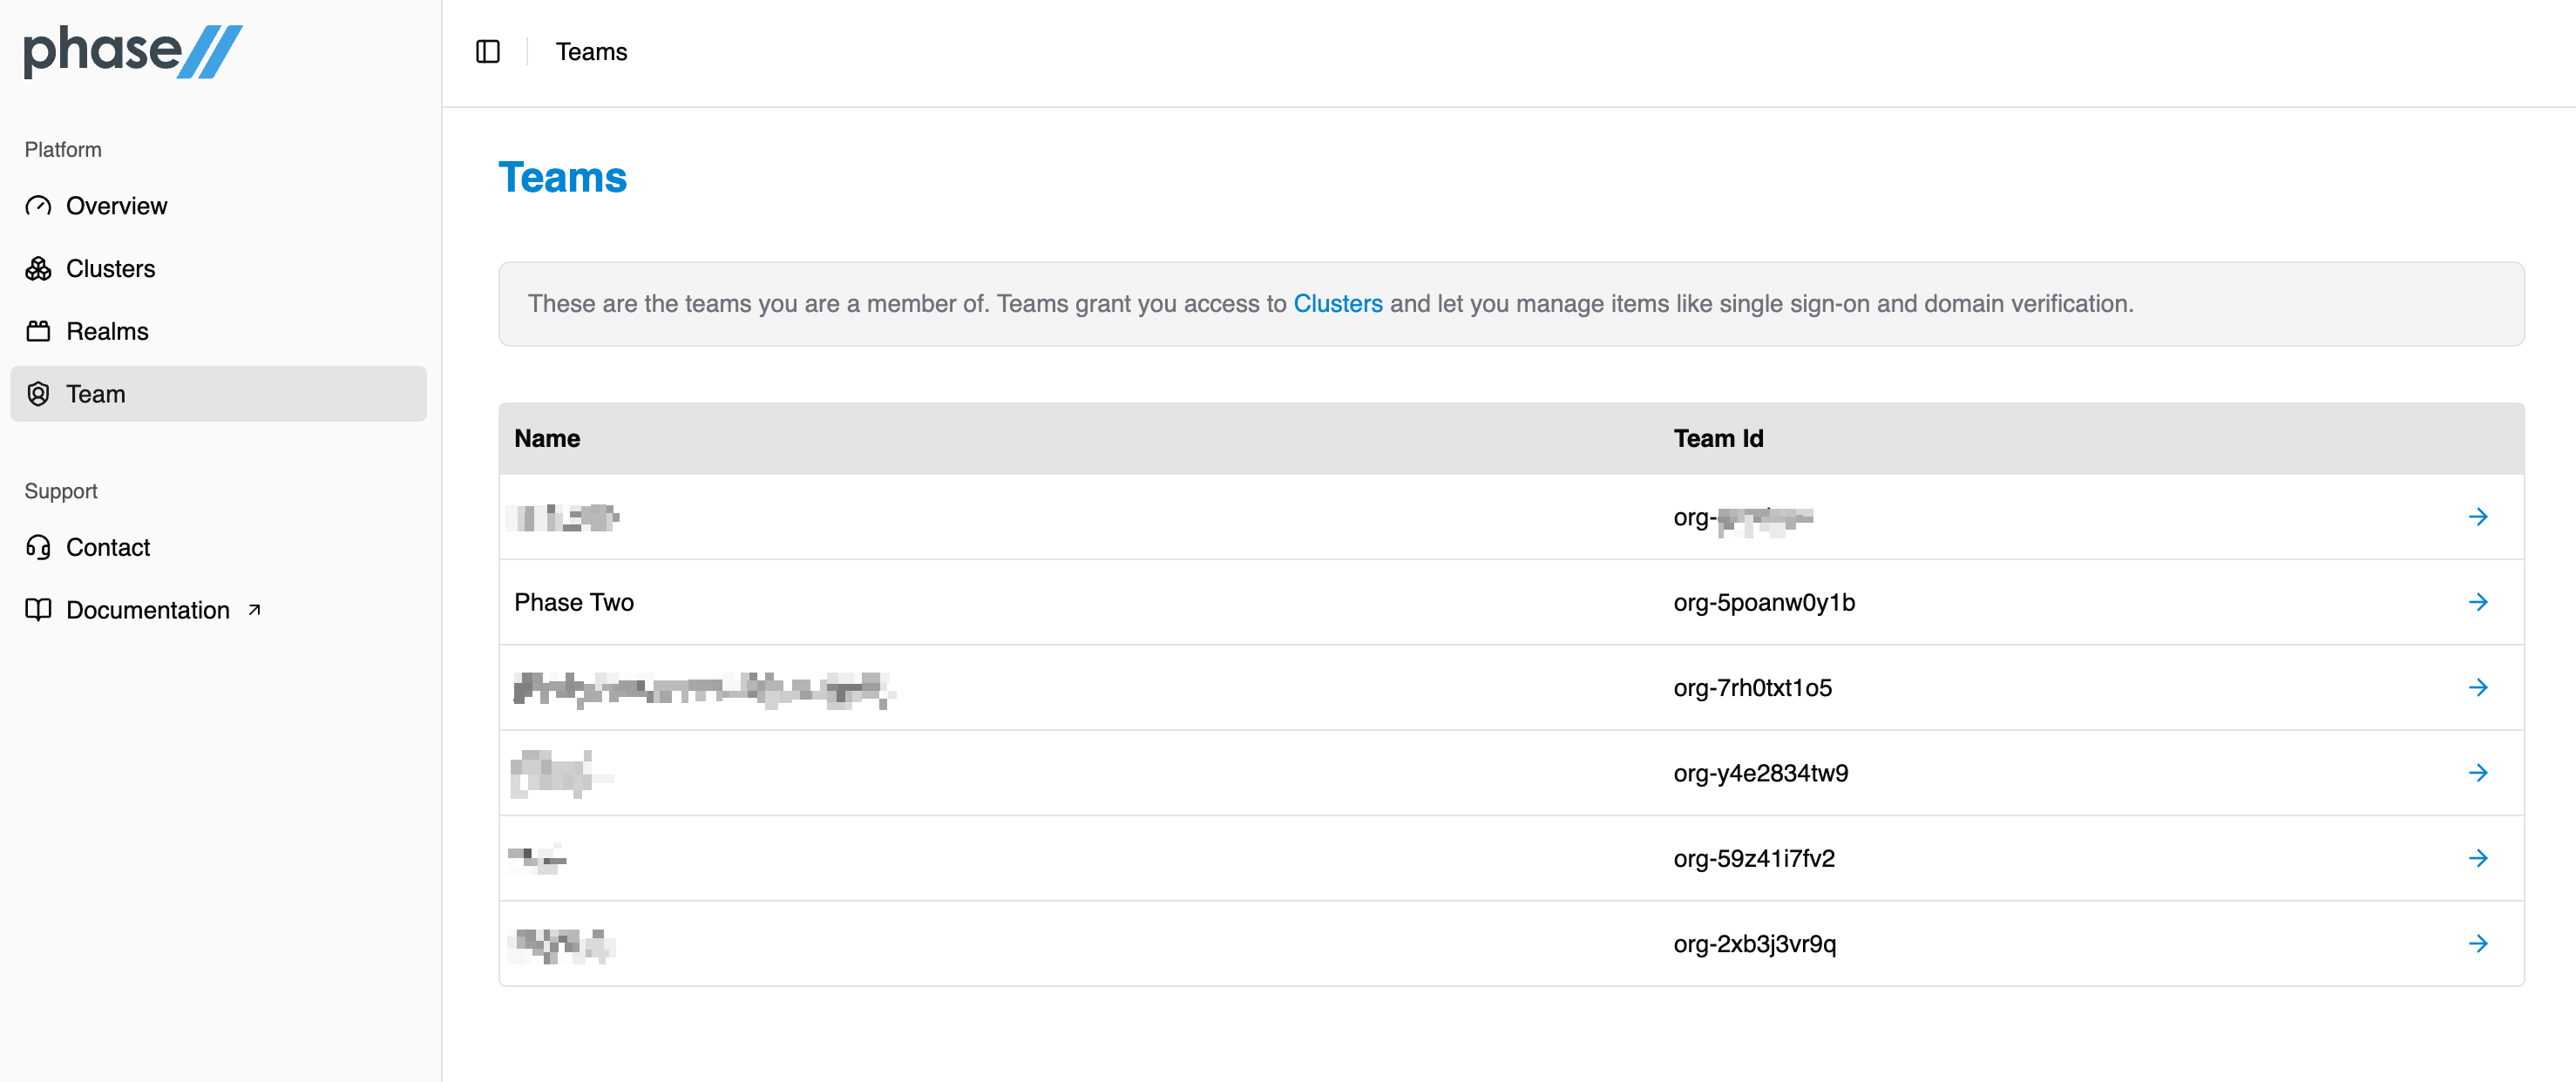
Click on a specific team to manage that team. This will allow you to view members, change details (names, etc), send invites, and setup SSO.
Members
Select the Members tab to view members of an organization. You can search for a specific member (name, email).
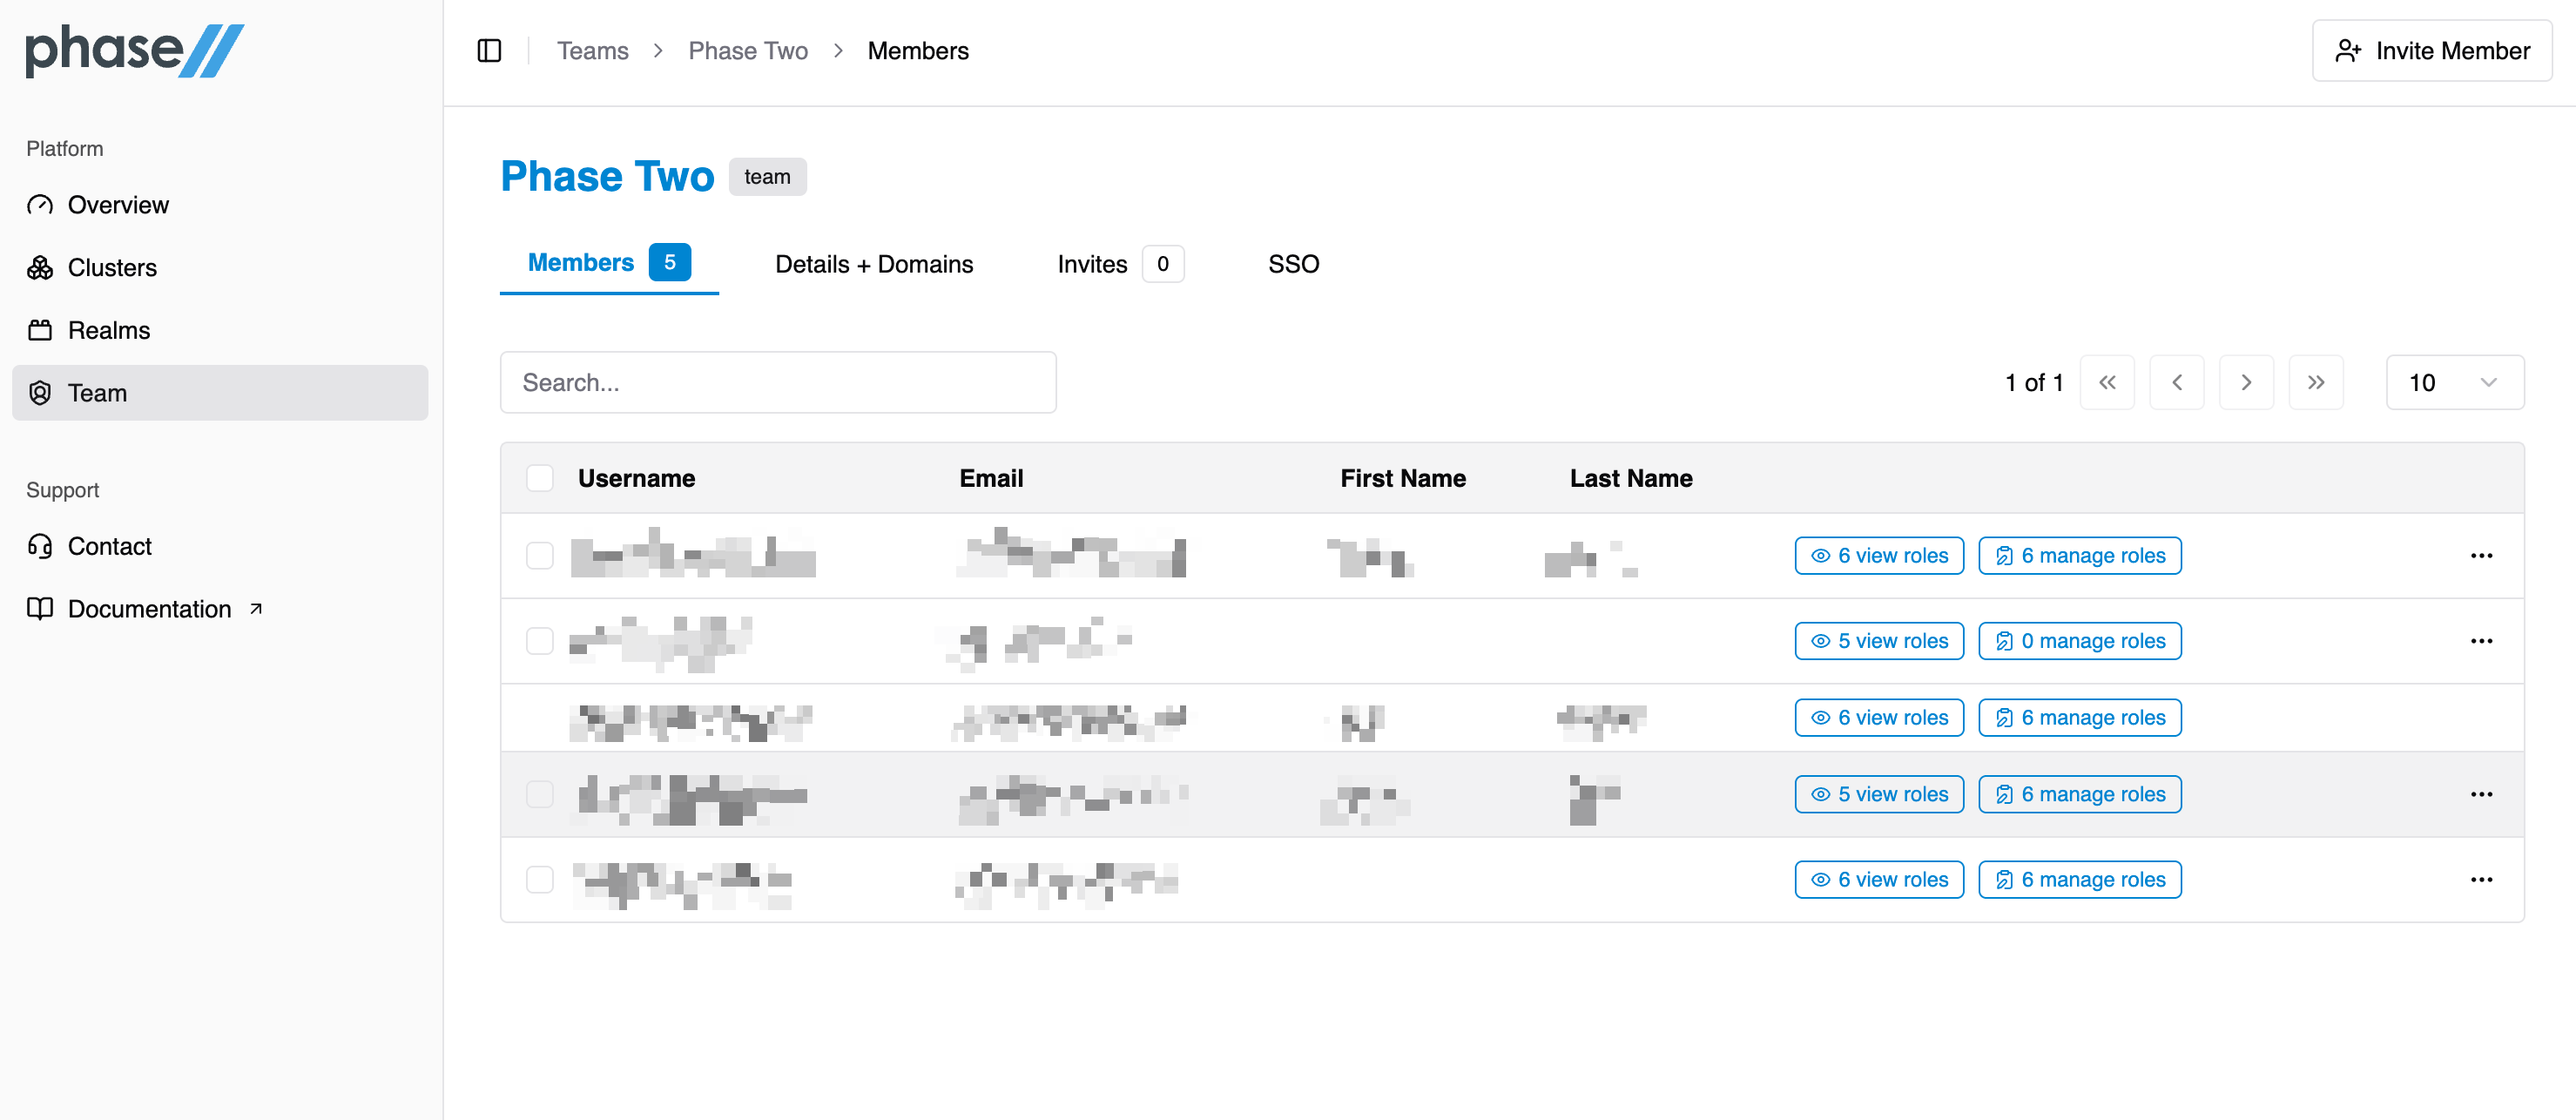
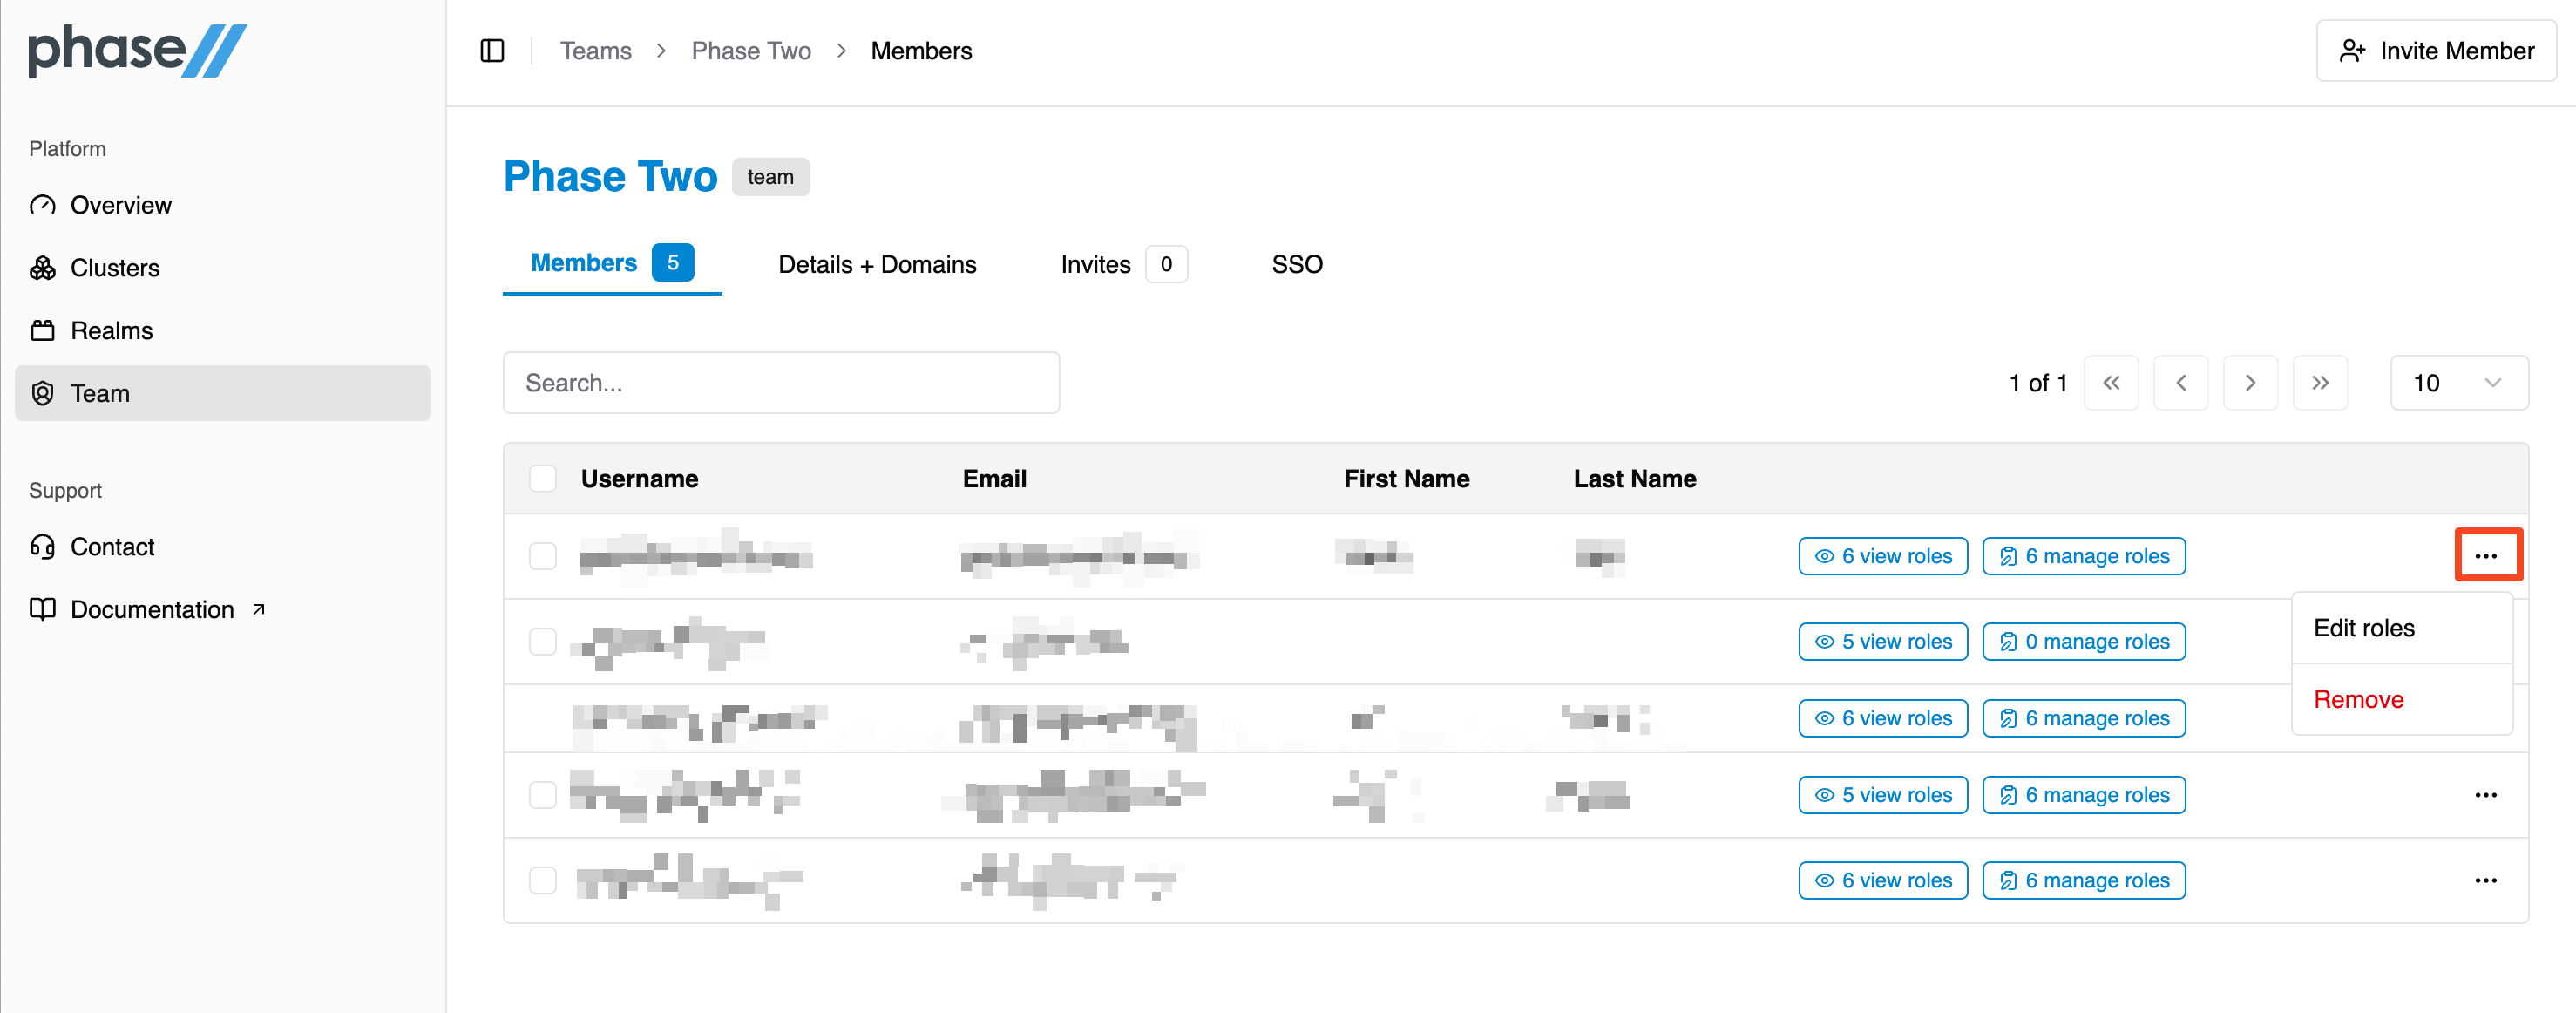
In the members list you can perform a couple of actions:
- Click the far right "***" menu
- Edit roles: change the roles a user has within a realm or cluster.
- Remove member: removes their membership, does not delete their account. They will not longer be able to access any associated realms or clusters.
- Click the "realm" badges
- Edit roles: change the roles a user has within a realm or cluster.
Roles
Roles can be assigned at a high-level:
- View. Can see all details but cannot edit. Can use realms owned by this organization.
- Manage. Can see and edit all details. Can use realms owned by this organization.
Or fine-grained, where the names of the roles explain their functionality.
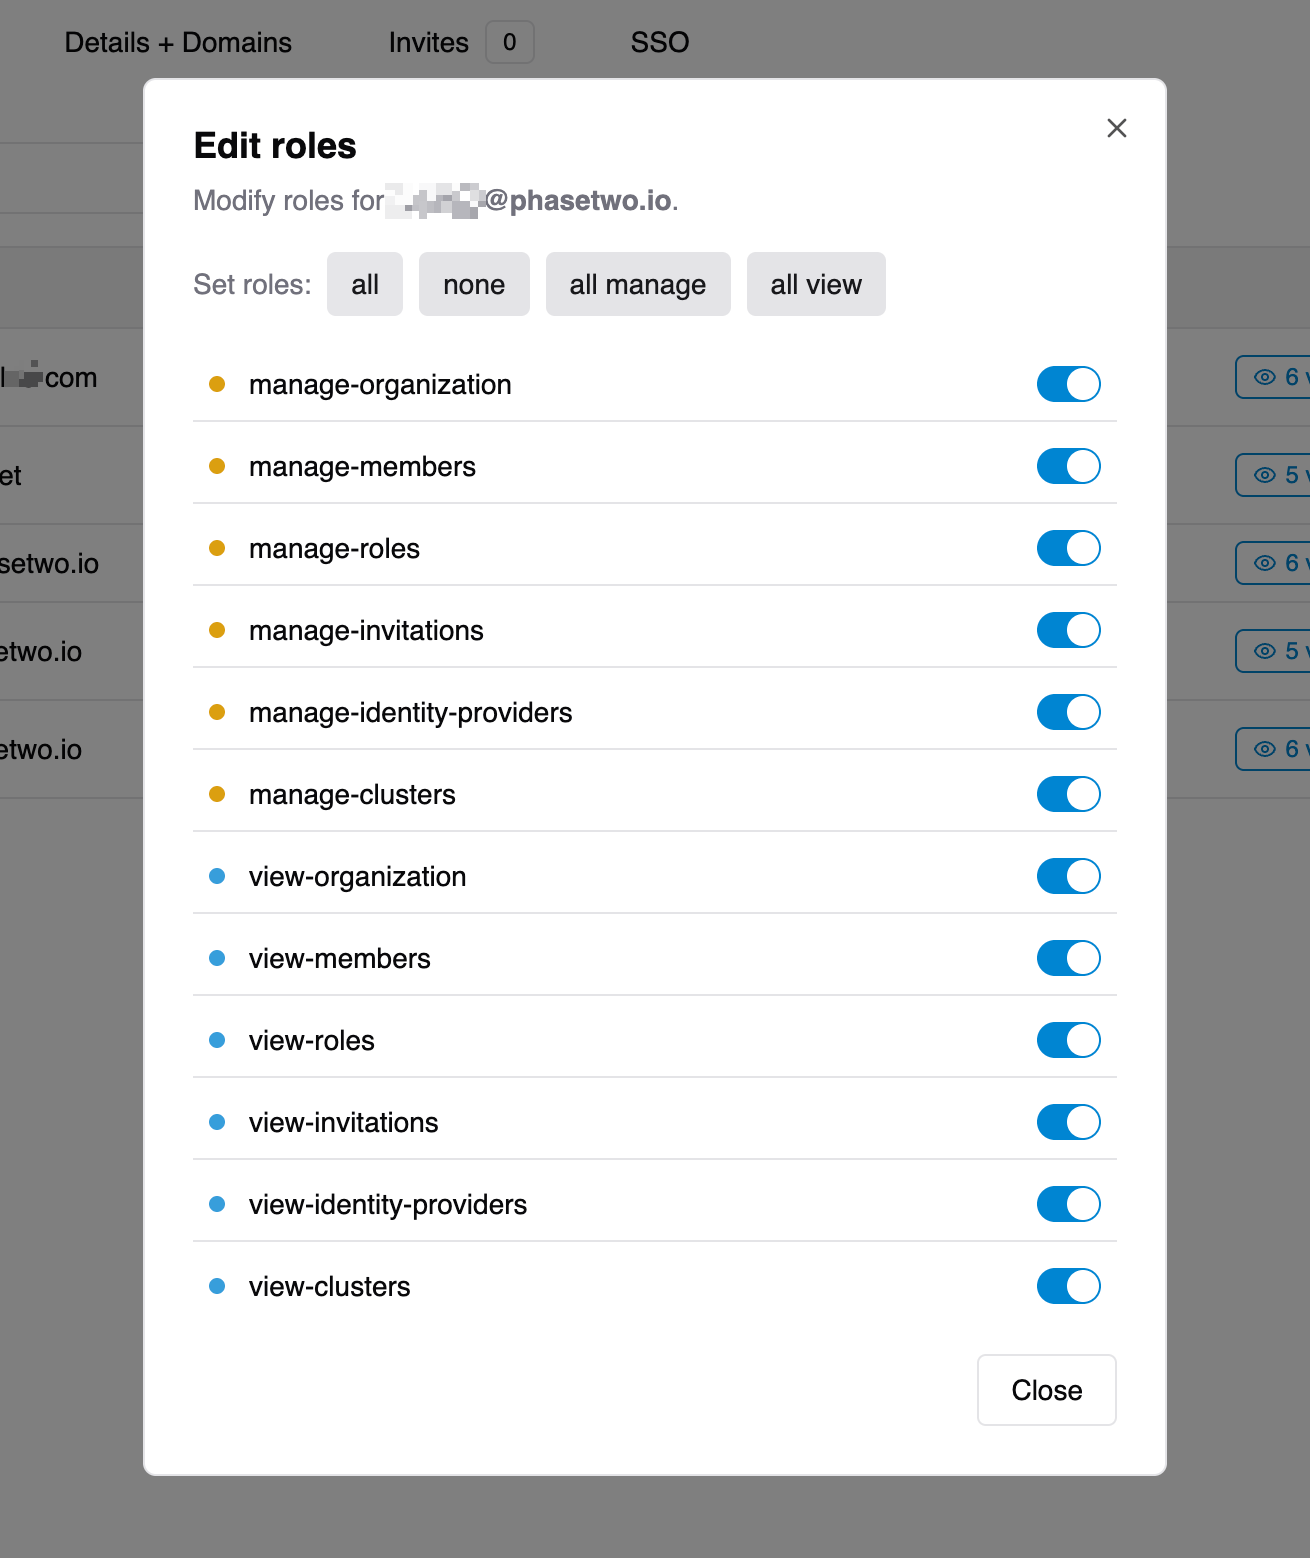
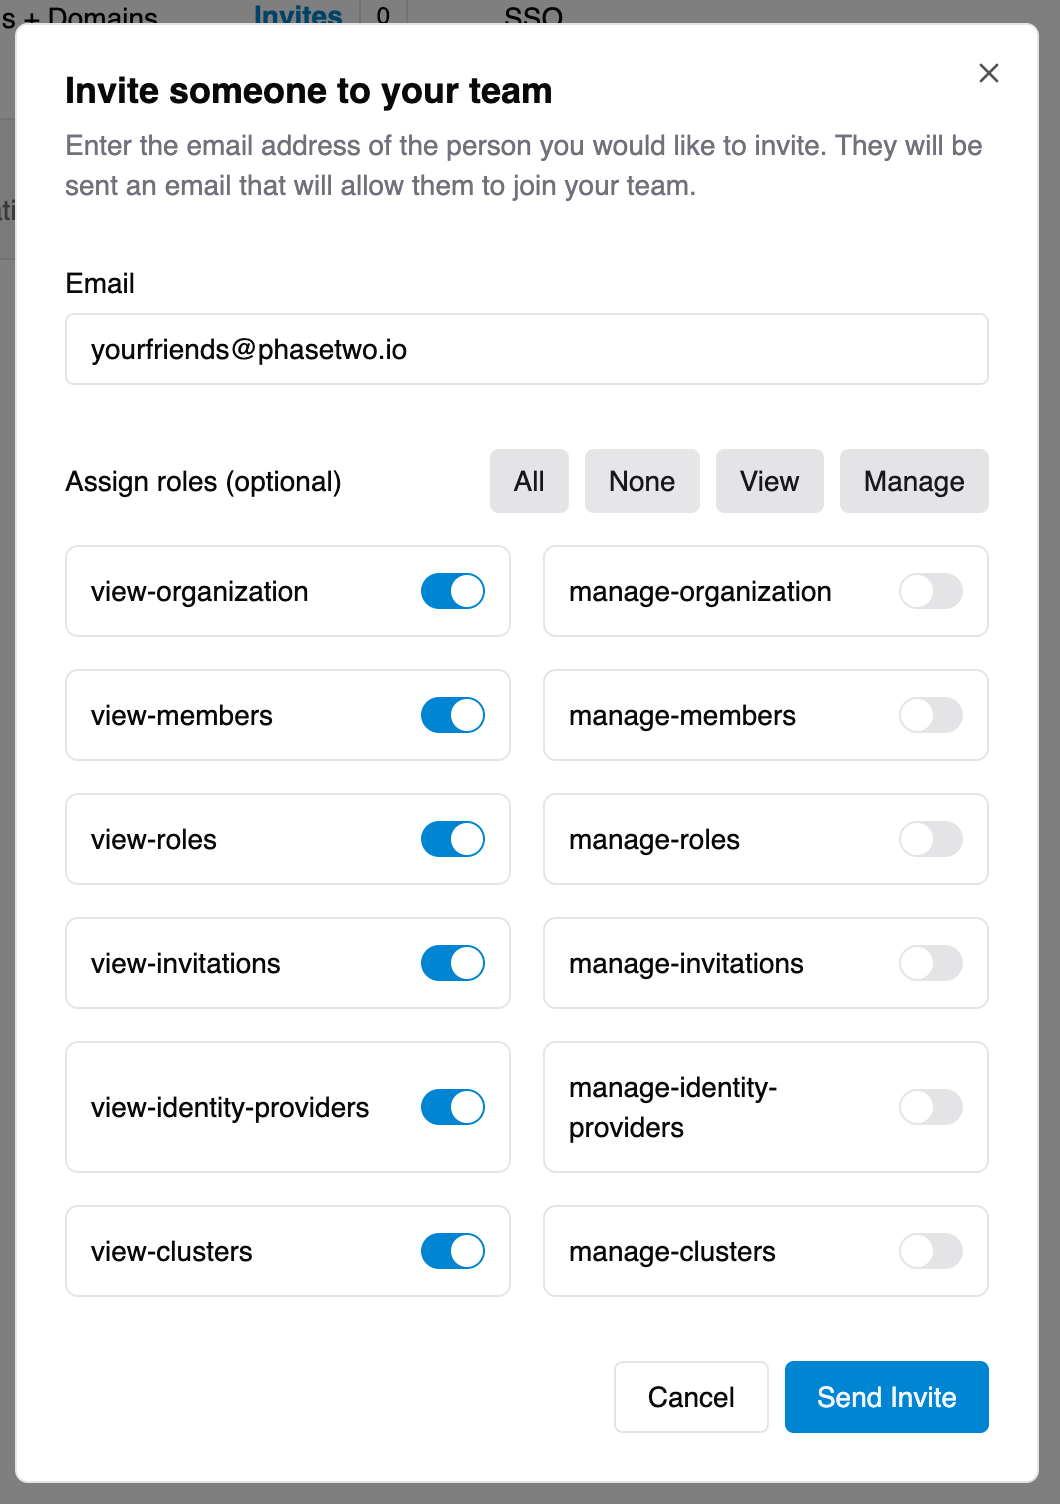
View Roles
view-organization: able to view the teamview-members: able to view the members within a teamview-roles: able to view roles within a teamview-invitations: able to view invites within a teamview-identity-providers: able to view IdPs within a teamview-clusters: able to view the cluster(s) that a team owns
Manage Roles
manage-organization: able to manage the teammanage-members: able to manage the members within a teammanage-roles: able to manage roles within a teammanage-invitations: able to issue and manage invites within a teammanage-identity-providers: able to setup and managed IdPs within a teammanage-clusters: able to manage the cluster(s) that a team owns
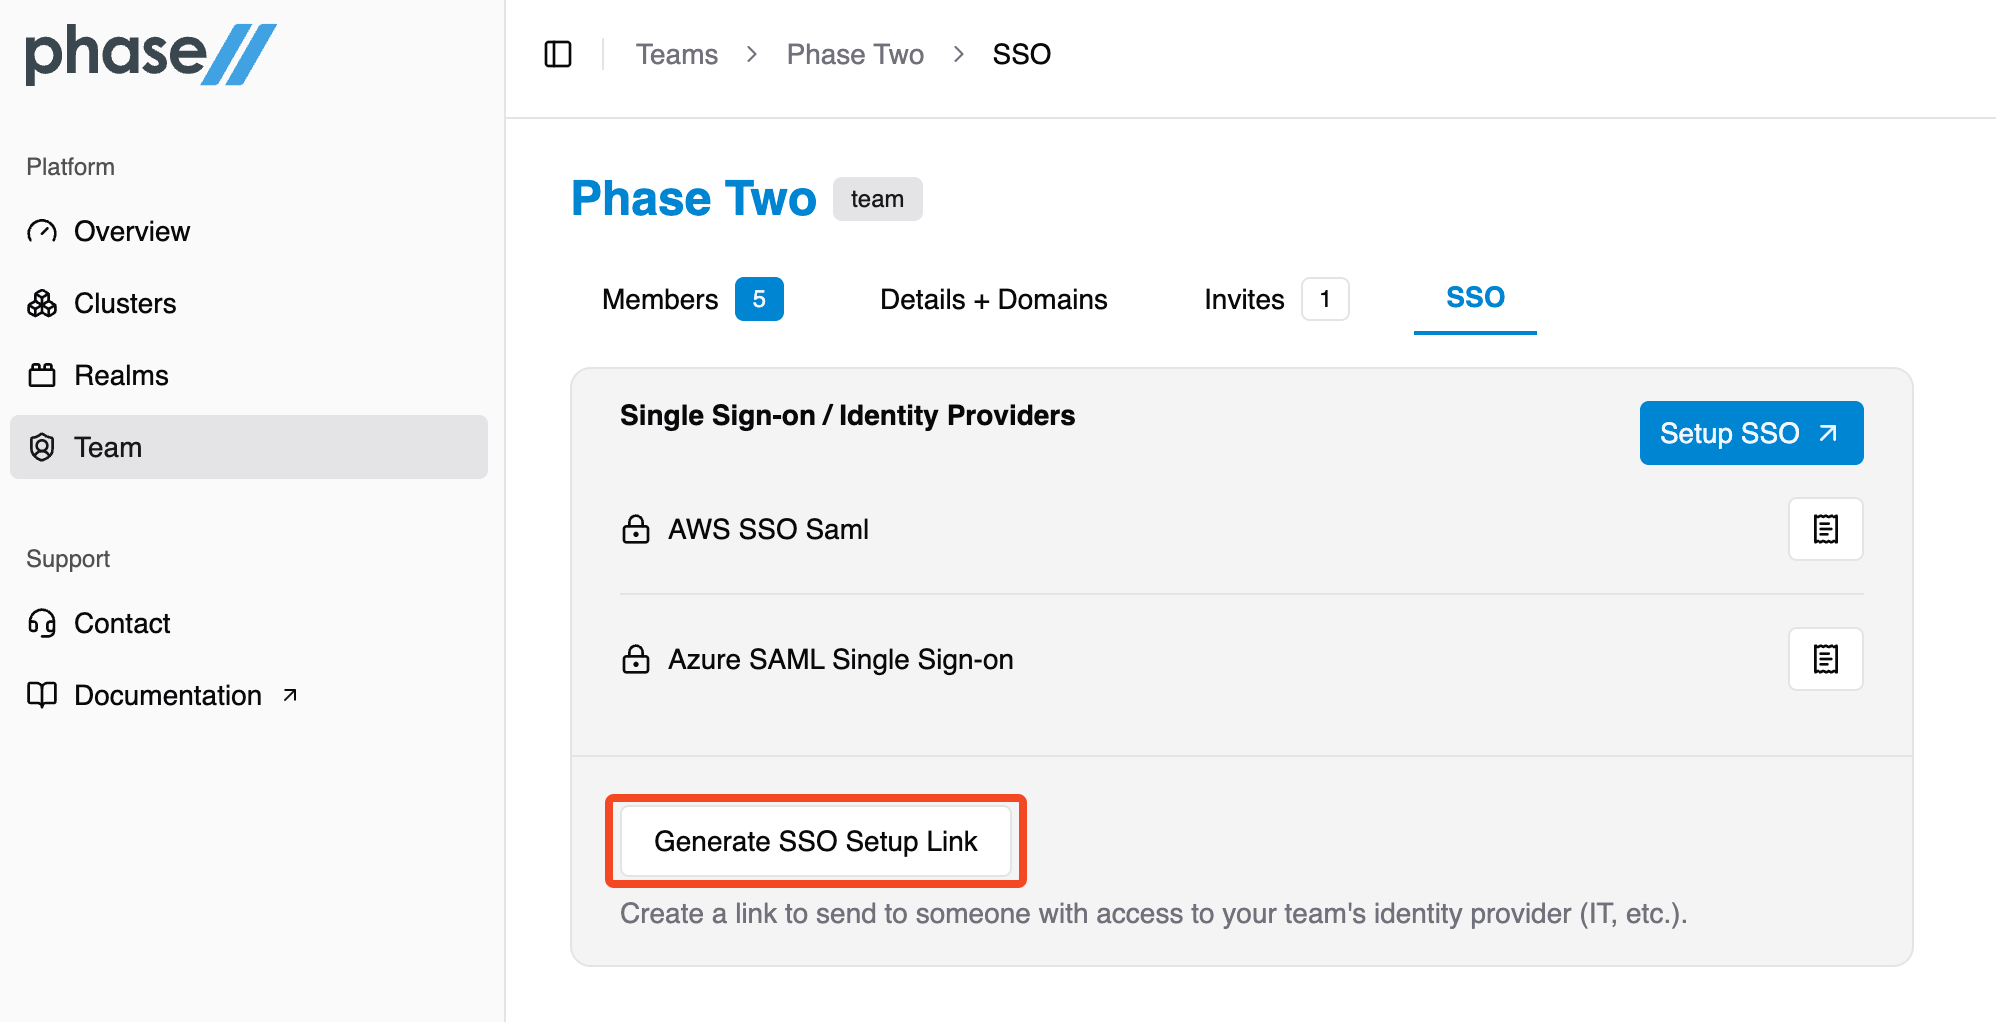
SSO
If your organization wants to use its own identity provider to log into Phase Two self-service, you can set it up using our SSO wizards. Select the SSO Setup tab to take two paths to adding an IdP that can be used.
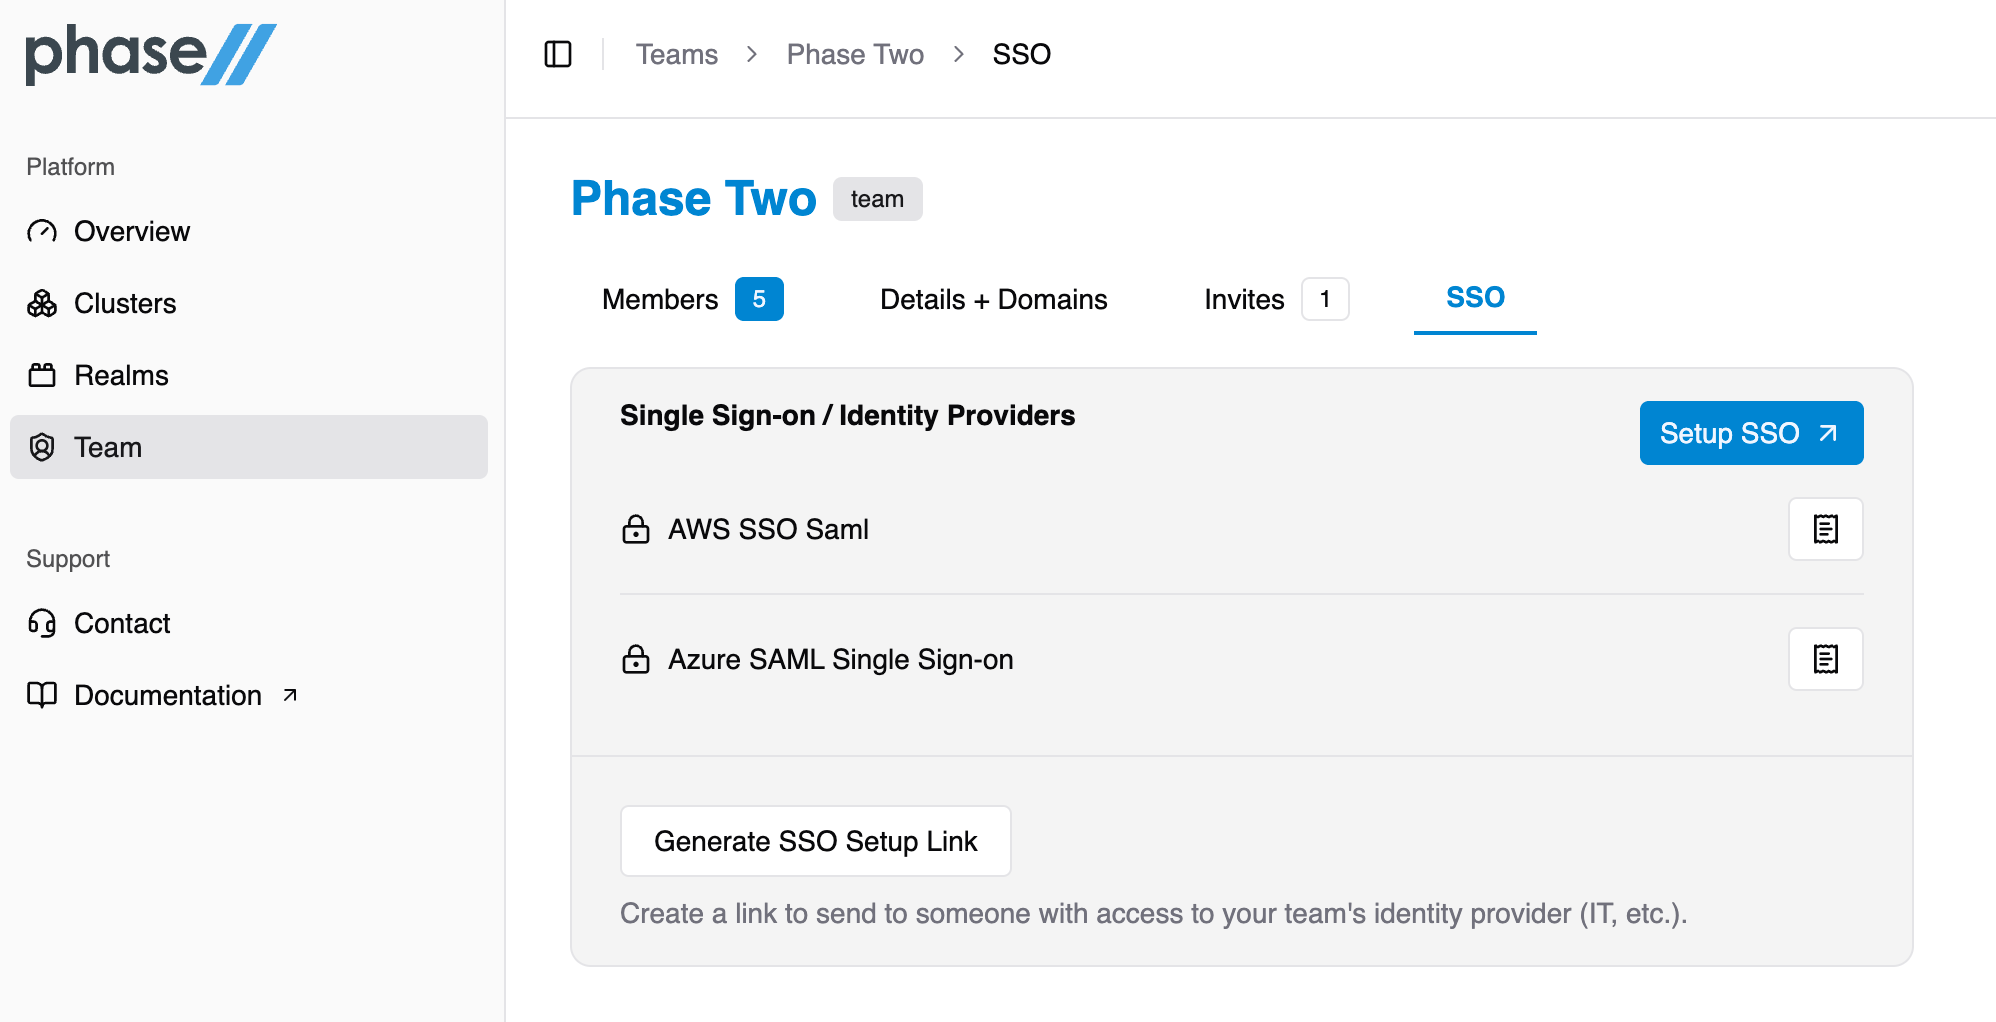
- Use the IdP Wizard
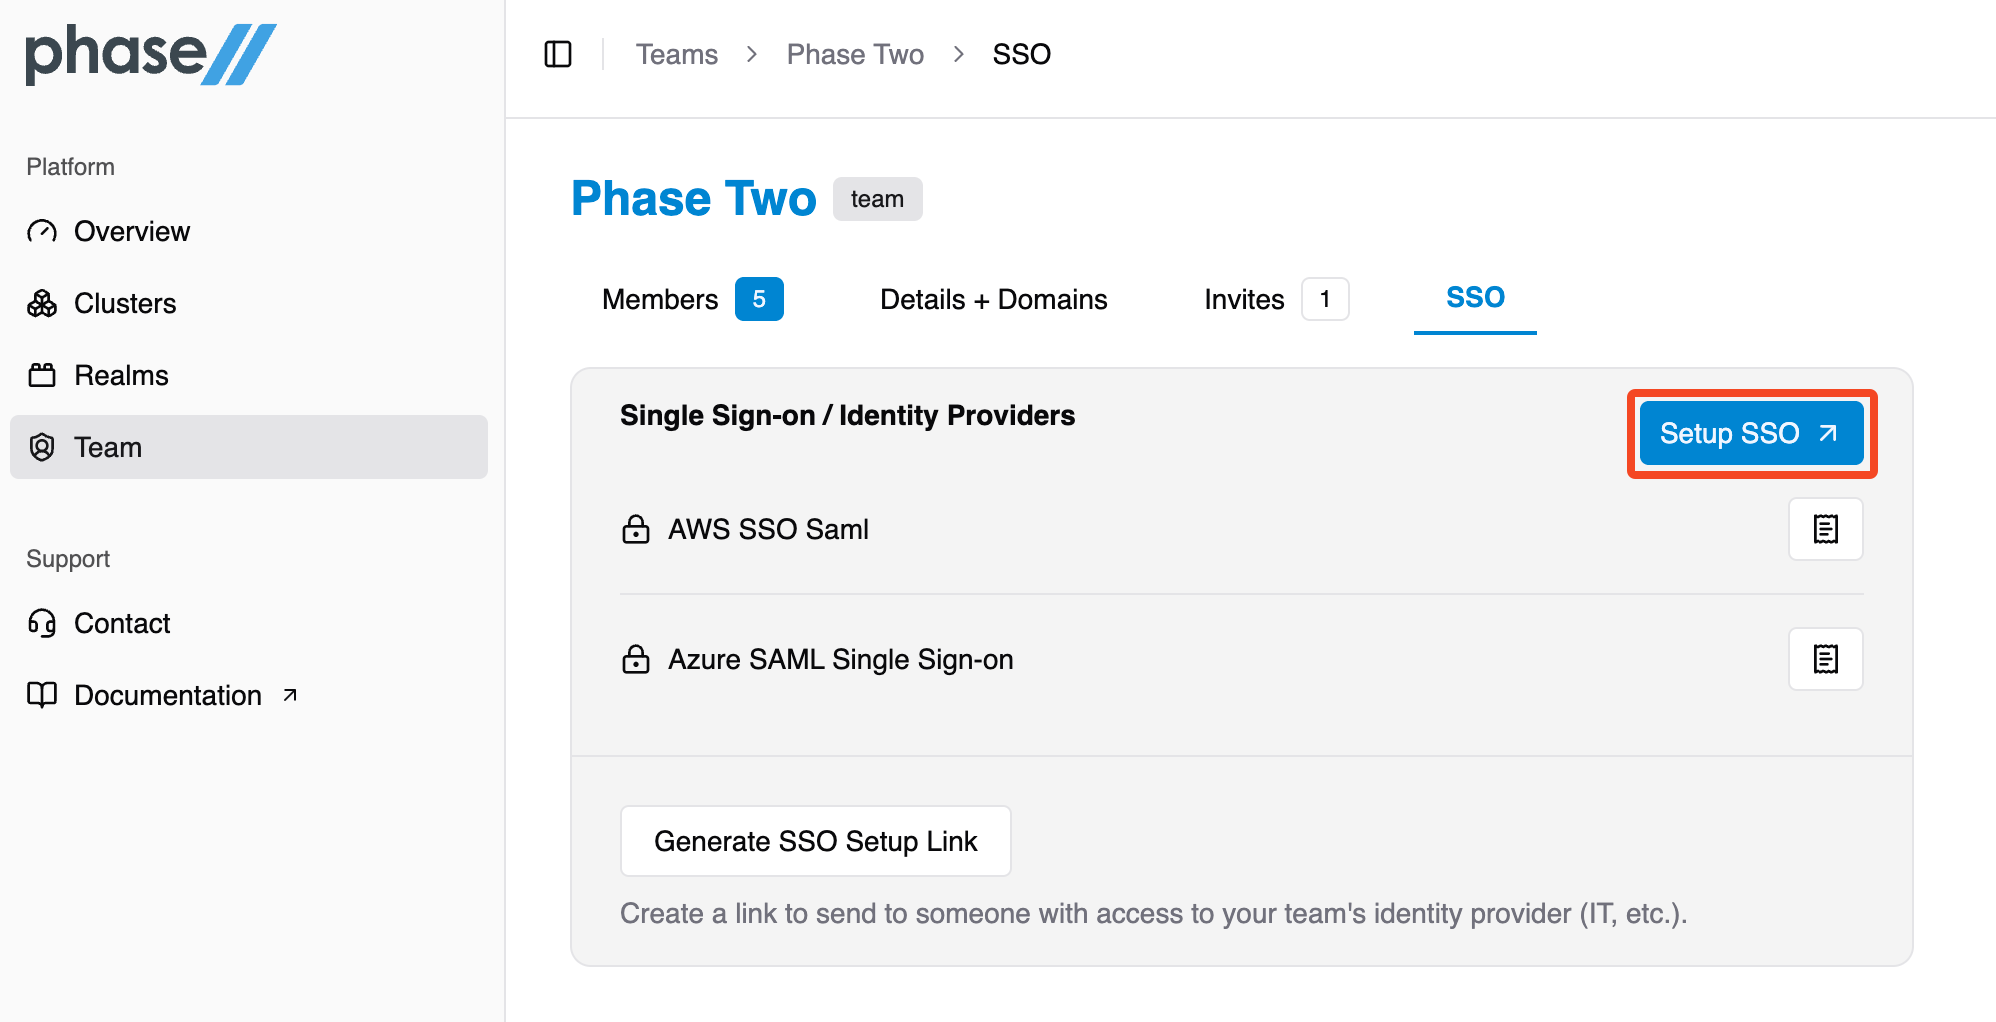
- Generate a link for an IT admin to use the IdP wizard
Once setup, you can view the full representation of the IdP.

Invitations / Add Members
Invites are first class citizens, allowing you to add and manage the team.
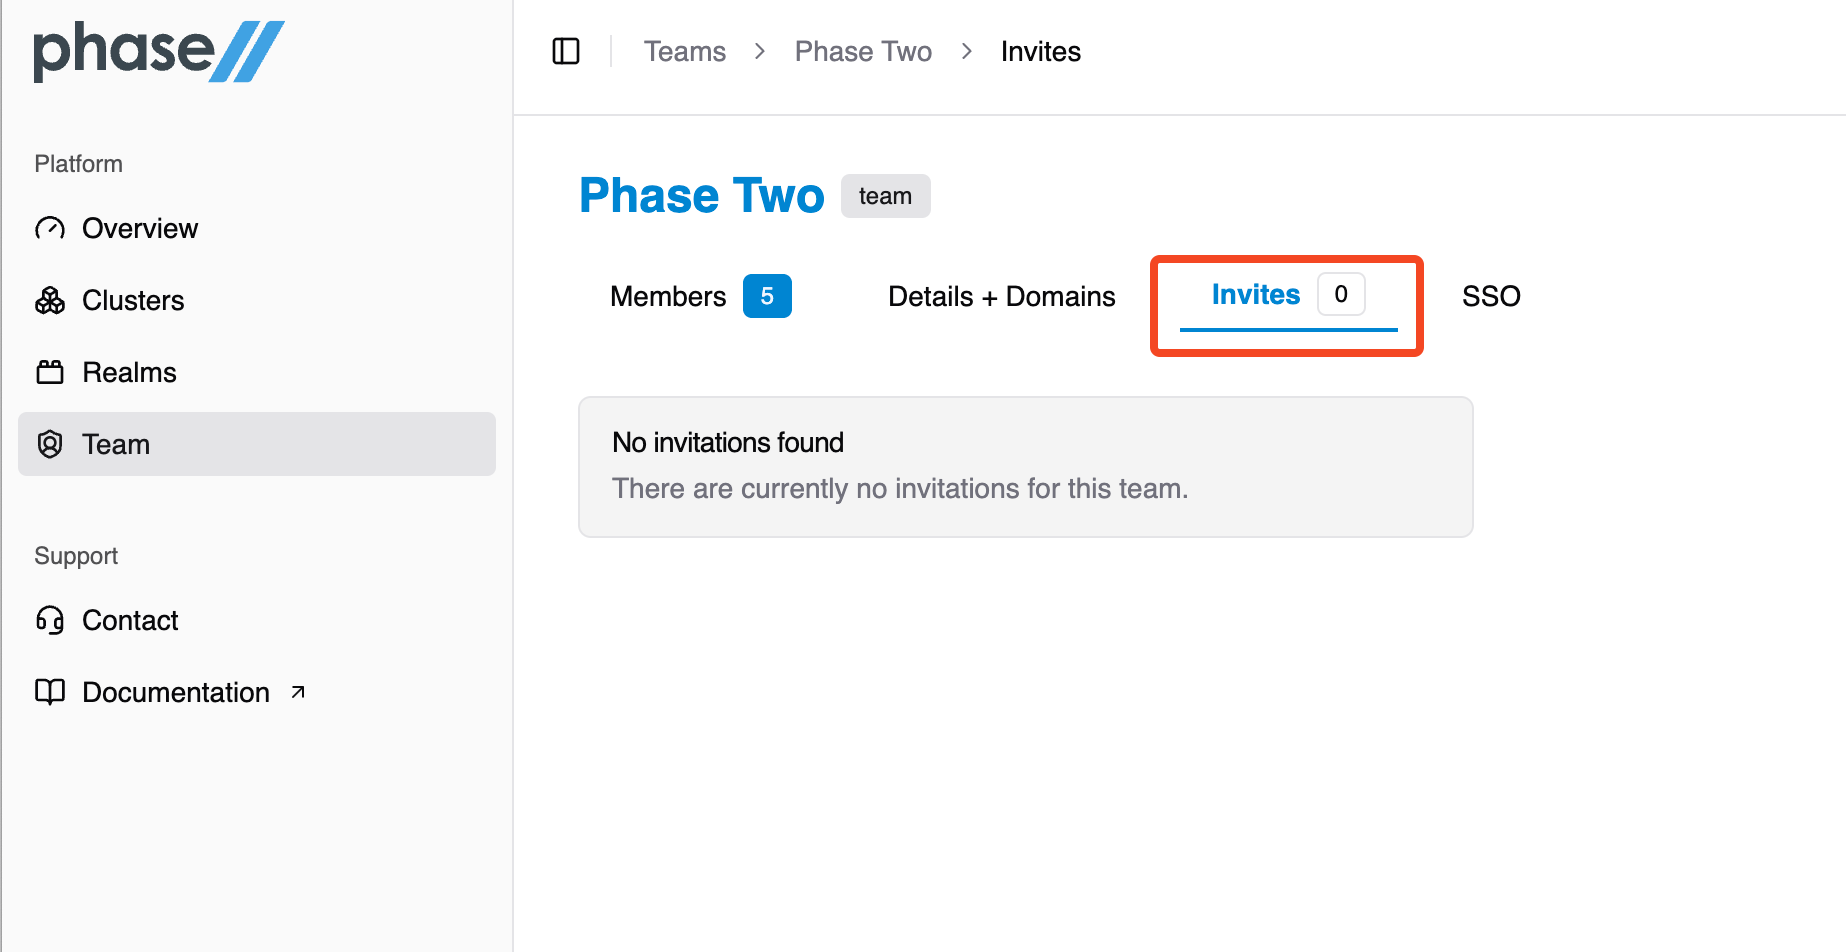
New members may be invited by their email address by selecting the Invite new member button on the members list page.
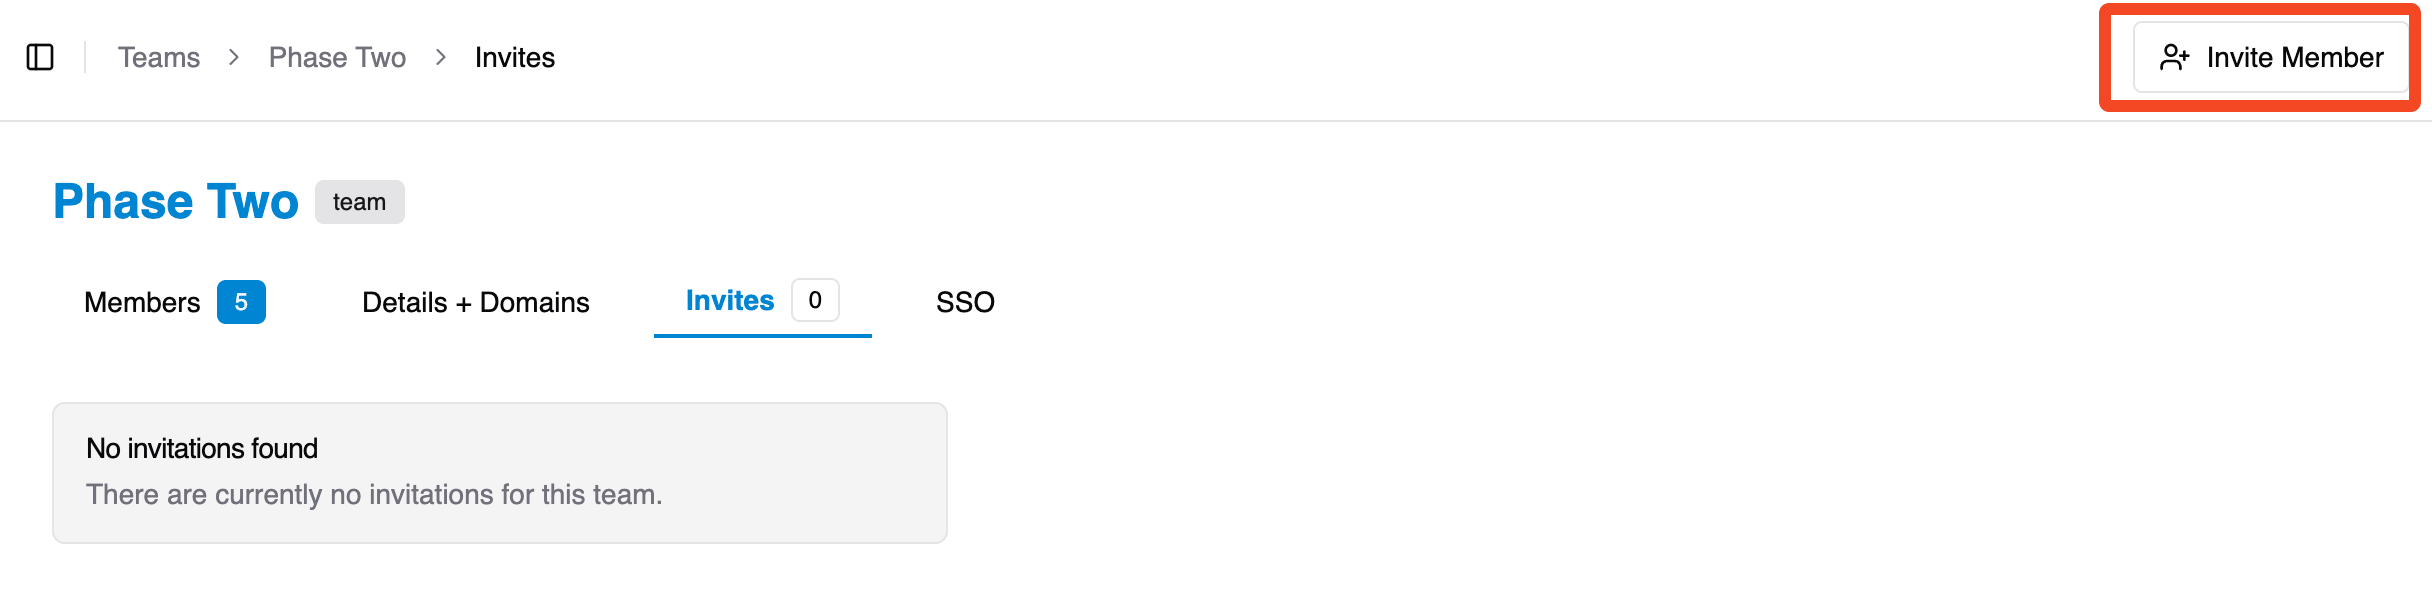
Invites can be pre-setup with specific roles.
After an invite has been sent, it will appear in the invite list. You can resent or remove an outstanding invite.
Details + Domains
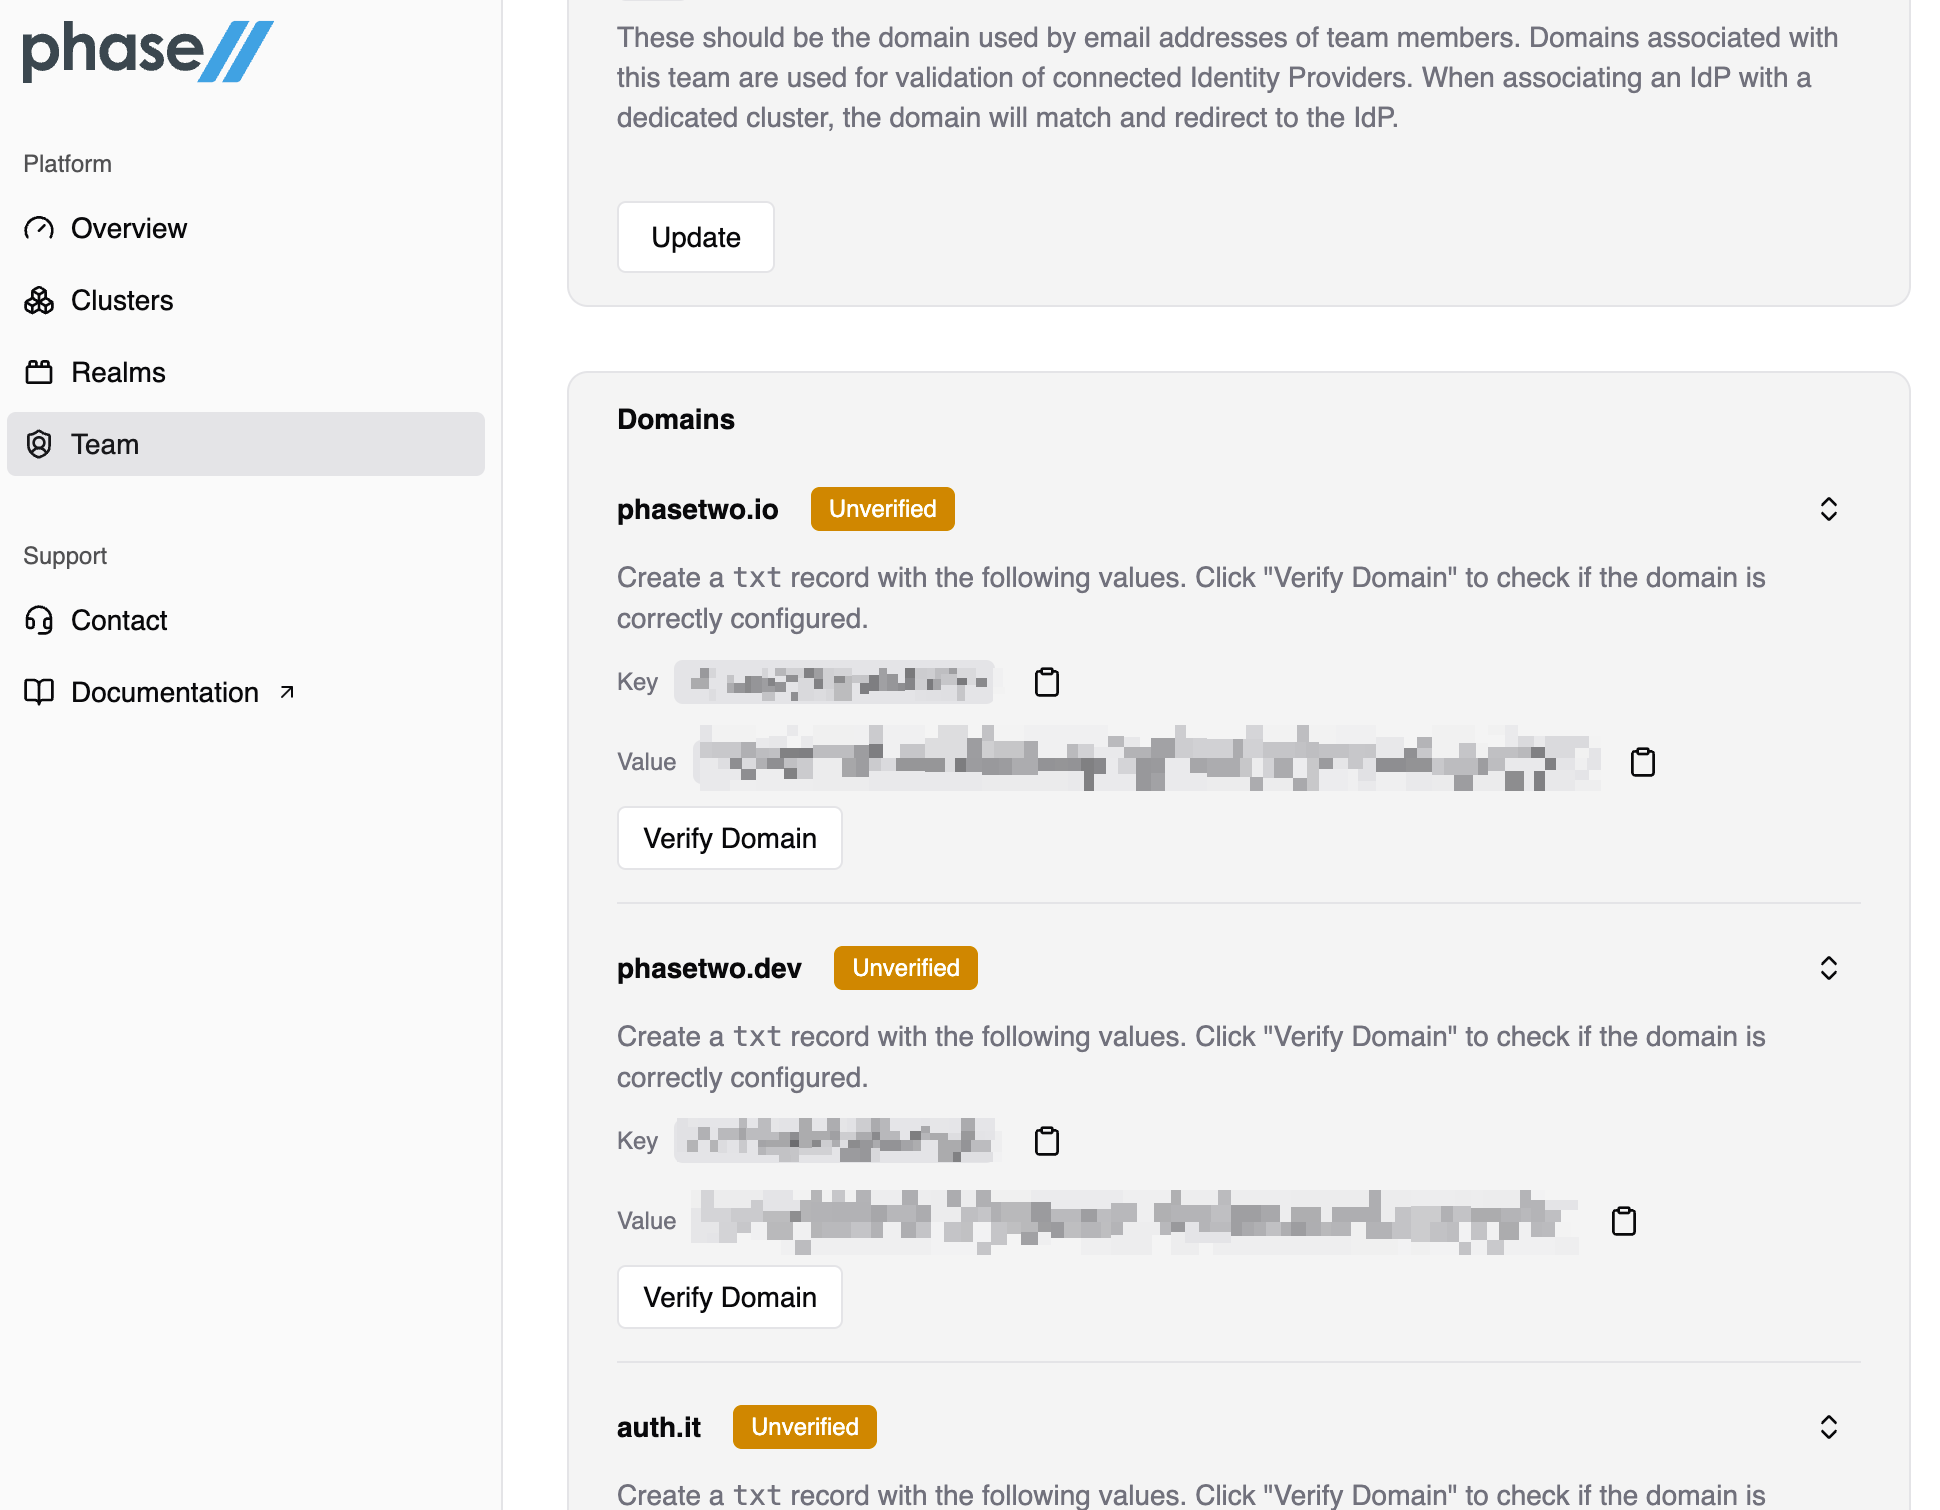
Phase Two teams can change their display name and associated domains. SSO requires validated email domains in order to redirect authentication requests for your users. Add domains using the form under the information group.
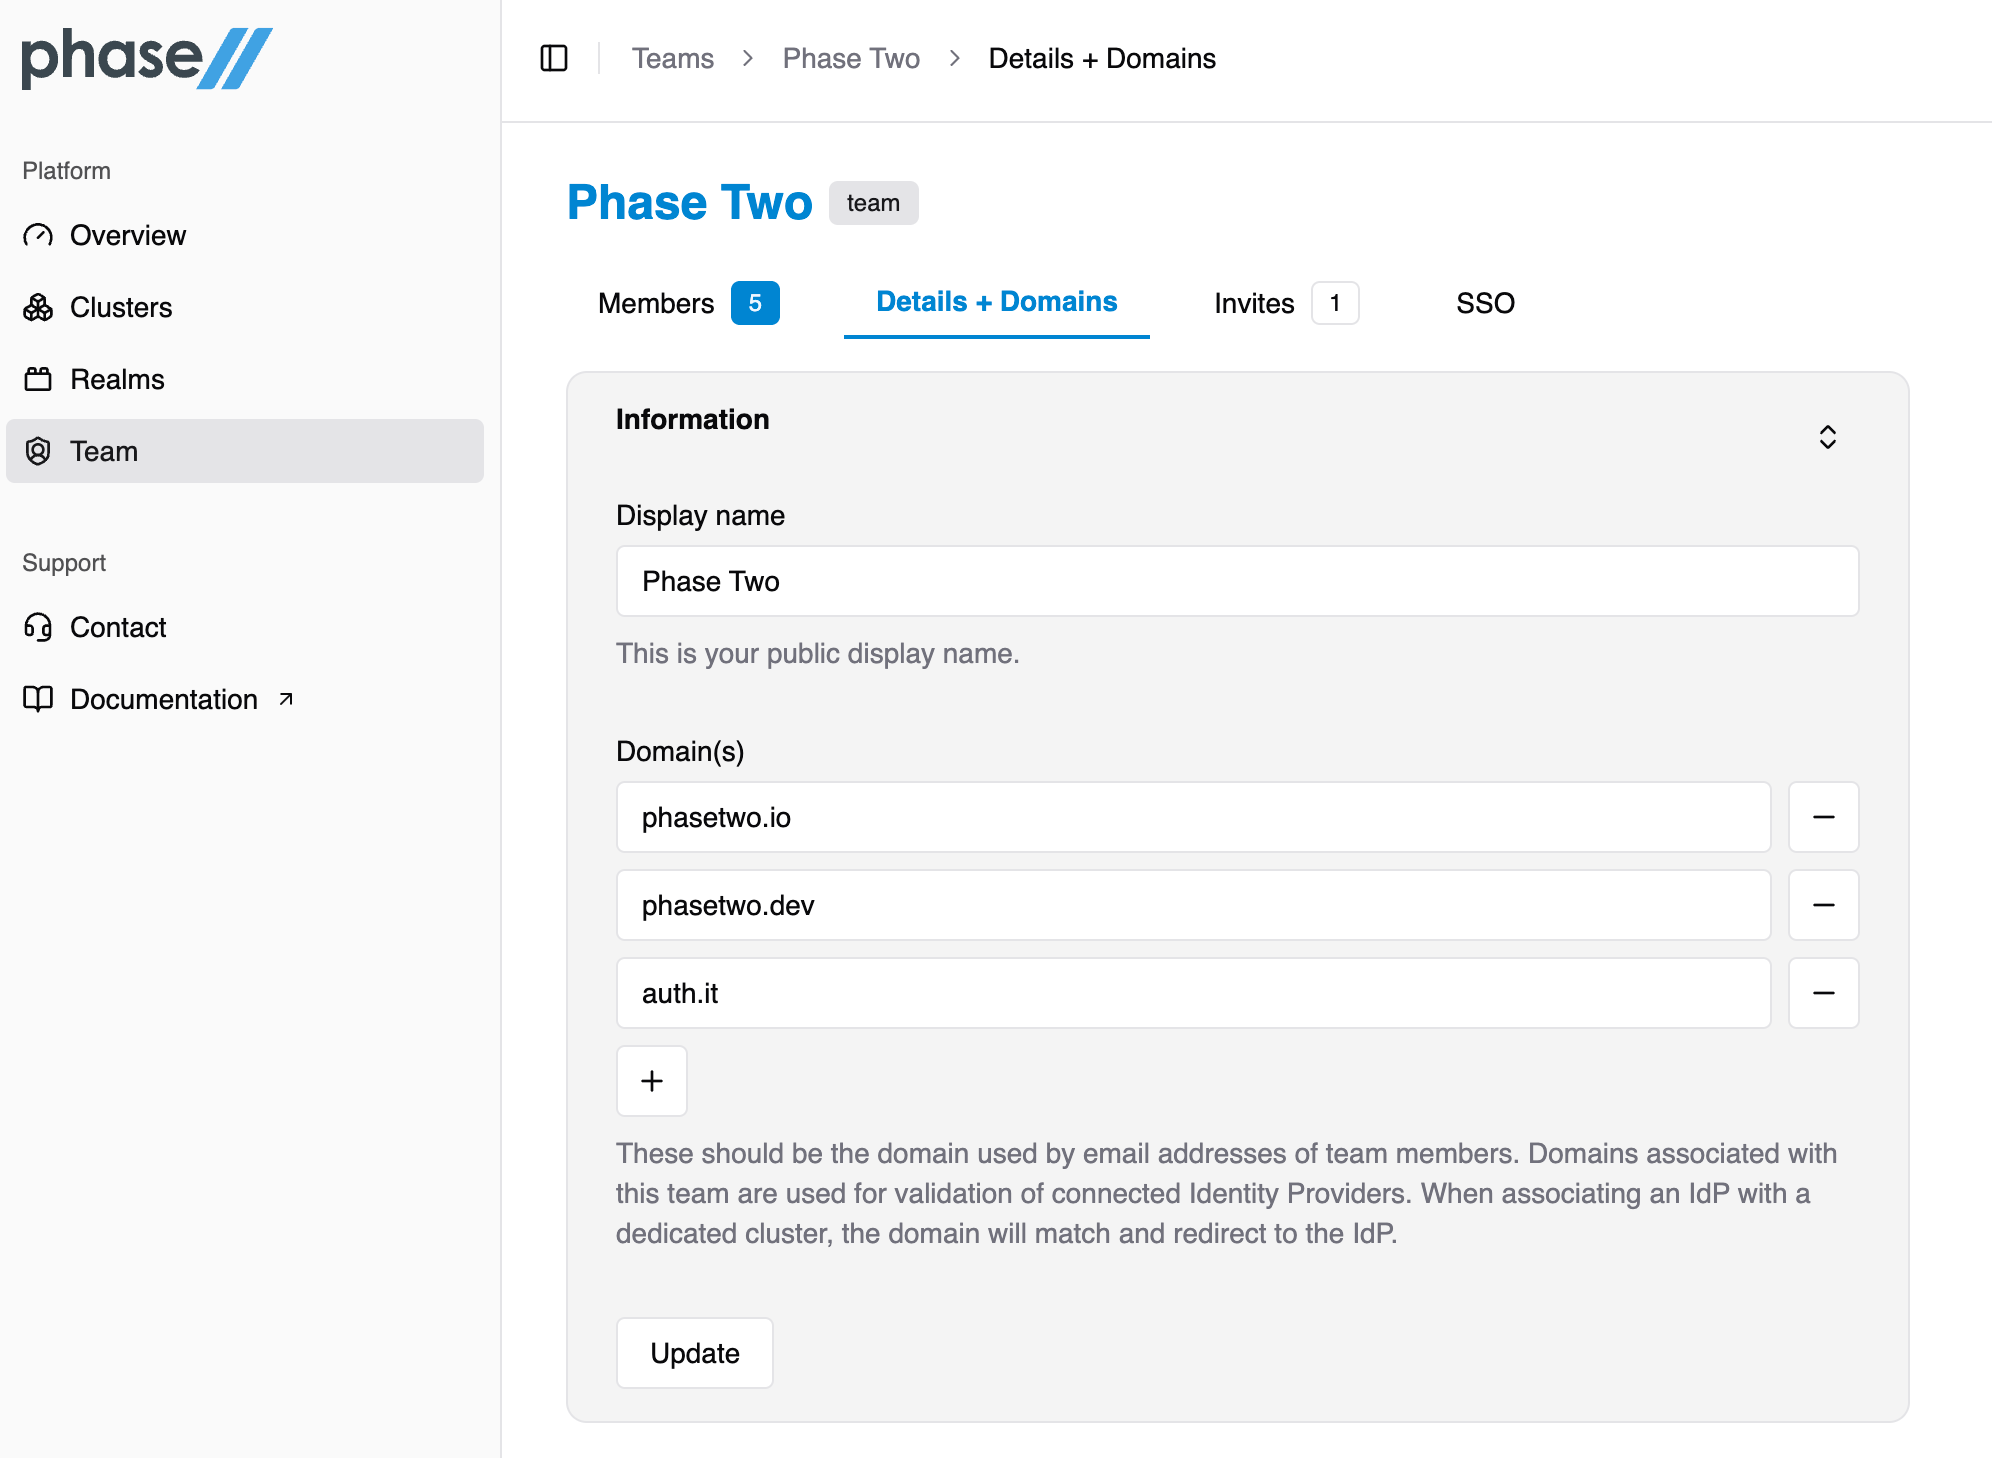
Once you have added a domain, you will be prompted to set up a DNS TXT record for the domain you have entered. The details for setting up that record can be found by within the "Domains" section.
Follow the instructions to add a TXT for validation. Once you have added that record, return and select Verify Domain. Because DNS records often take some time to propagate, please be patient, as verification may take up to 24 hours.
Automatic Team Membership
Once you have configured SSO and verified an email domain, all users that authenticate using your identity provider will automatically be added to your organization. They will be granted no roles by default.